
Setting up Paralus is quite simple irrespective of the infrastructure you're deploying it on. You've seen in the previous blog post, where we showed how to deploy Paralus to Azure's Kubernetes Service (AKS)
In this blog post, we'll take you through the steps to setup Paralus on Google Kubernetes Engine (GKE) using a custom domain and import a local cluster into it. Let's get started!
Table Of Content:
Pre Requisites
To setup Paralus on Google Kubernetes Engine (GKE) there are a few prerequisites:
- A Google Cloud account - you can register for a Free Google Cloud account if you don't have one
- A Domain Name - with permission to manage DNS settings.
- Helm
We'll start with setting up a cluster on GKE, followed by deploying Paralus to it using helm charts. Once the installation is done, we'll configure the DNS settings for the domain for Paralus to work. After that we'll login to the Paralus dashboard and import a Kubernetes cluster that is running on a local laptop.
Creating GKE Cluster
GKE provides you with options to create various types of clusters ranging from zonal, regional, autopilot, private and alpha cluster. However, we create a simple standard Kubernetes cluster using the cloud portal. For this tutorial you can also follow the GKE quickstart guide to setup a cluster.
Note: GKE also provides you with multiple VM instances that you can use as your node machine. You can refer to the full list of GKE machine family for more details. By default it will create a cluster with 3 node machines with a total of 6 vCPUs and 12 GB RAM.
After the cluster is created, start the cluster and connect to it. You can connect to your cluster using the cloud shell provided.
Installing Paralus
Add helm repo
helm repo add paralus https://paralus.github.io/helm-chartsInstall Paralus
 helm install myrelease paralus/ztka \
  -f https://raw.githubusercontent.com/paralus/helm-charts/main/examples/values.dev-generic.yaml \
  --set fqdn.domain="chartexample.com" \
  -n paralus \
  --create-namespace
Note: If you're installing this in a production environment, please use values.yaml and configure the values mentioned here as required.
Note: Since v0.1.9, elasticsearch is an optional component. By default, Paralus will use database (Postgres) as the auditlog storage component. If you're doing a fresh install, below are the values.yaml file that you must pass during installation:
- Postgres (default): https://raw.githubusercontent.com/paralus/helm-charts/main/examples/values.dev-generic.yaml
- Elasticsearch: https://raw.githubusercontent.com/paralus/helm-charts/main/examples/values.elasticsearch.yaml
 NAME: myrelease
 LAST DEPLOYED: Fri Jul 01 17:13:48 2022
 NAMESPACE: paralus
 STATUS: deployed
 REVISION: 1
 NOTES:
 1. Access the application URL by running these commands:
   Get load balancer address via:
   kubectl get service envoy --namespace paralus -o jsonpath='{.status.loadBalancer.ingress[0].hostname}'

   Add DNS records of following domains such that it resolves to above address:
   - console.chartexample.com
   - *.core-connector.chartexample.com
   - *.user.chartexample.com
   Open http://console.chartexample.com in browser.

  You can view the default password for admin@paralus.local by running the following command once all the pods are running:

  kubectl logs -f --namespace paralus $(kubectl get pods --namespace paralus -l app.kubernetes.io/name='paralus' -o jsonpath='{ .items[0].metadata.name }') initialize | grep 'Org Admin default password:'
Note: It can take upto a few minutes before all the pods are running and you can access the dashboard. You can check the status using
watch kubectl get pods
Configuring DNS Settings
Once the installation is complete, you need to first get the external IP address provided by GKE loadbalancer. You can do so by executing the following command:
kubectl get svc myrelease-contour-envoy -n paralus

NAME                            TYPE           CLUSTER-IP     EXTERNAL-IP    PORT(S)                         AGE
myrelease-contour-envoy         LoadBalancer   10.0.33.6      34.121.64.88   80:30193/TCP,443:30873/TCP      3m13s
Note down the EXTERNAL-IP address for the <releasename>-contour-envoy service.
Navigate to your domain's DNS setting page. The steps for changing DNS settings will vary based on your domain name provider.
While you are on your DNS Setting page, for the selected domain name, you need to add three A records. These will be based on the subdomains provided in the notes section post installation.
| Type | Address | Resolves To | TTL |
|---|---|---|---|
| A | console.chartexample.com | 34.121.64.88 | 1 Hour |
| A | *.core-connector.chartexample.com | 34.121.64.88 | 1 Hour |
| A | *.user.chartexample.com | 34.121.64.88 | 1 Hour |
Resetting Default Password
Paralus comes configured with default credentials that allow you to access the dashboard.
In order to get the default password, copy the command displayed after helm install and execute it
kubectl logs -f --namespace paralus $(kubectl get pods --namespace paralus -l app.kubernetes.io/name='paralus' -o jsonpath='{ .items[0].metadata.name }') initialize | grep 'Org Admin default password:'

Org Admin default password: 8[&C2(74^
In a new browser window/tab navigate to http://console.chartexample.com and log in with the following credentials:
- username:
admin@paralus.local- or the one you specified invalues.yaml - password:
<generated above>
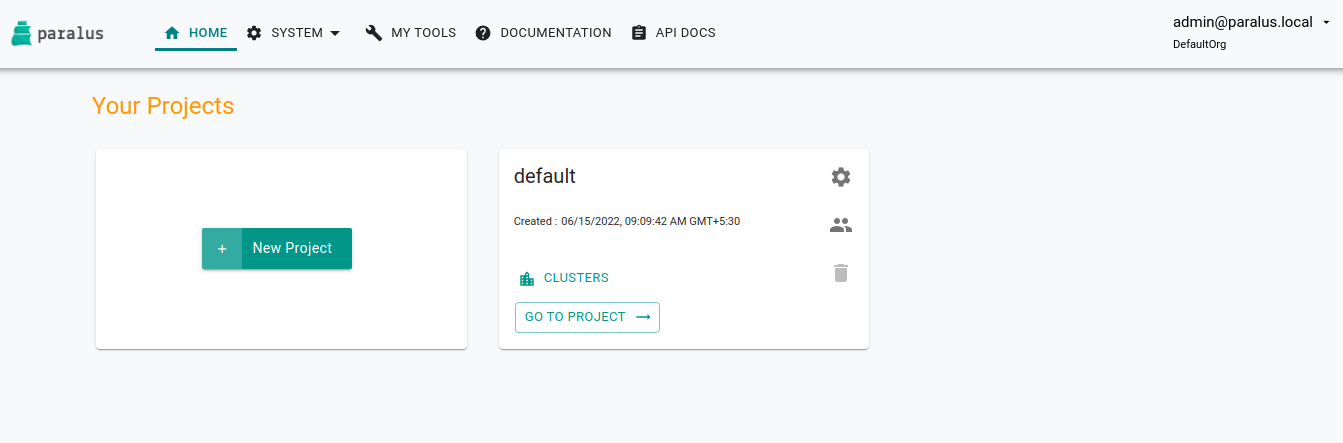
It will ask you to change the default password. Please provide new set of passwords to proceed. If successful, you'll be redirected to the projects page where you'll see a default project.
Importing Existing Cluster
Everything in Paralus is grouped into Projects. Each project will have clusters, users and groups associated with it. Hence the first step it to create a new project.
Click on New Project to create a new project and then import a cluster in that project. The cluster we are importing is a minikube cluster hosted on my laptop.

Click Continue and download the bootstrap yaml file by clicking Import Bootstrap YAML. This will download the YAML file that is required to connect your cluster with Paralus.
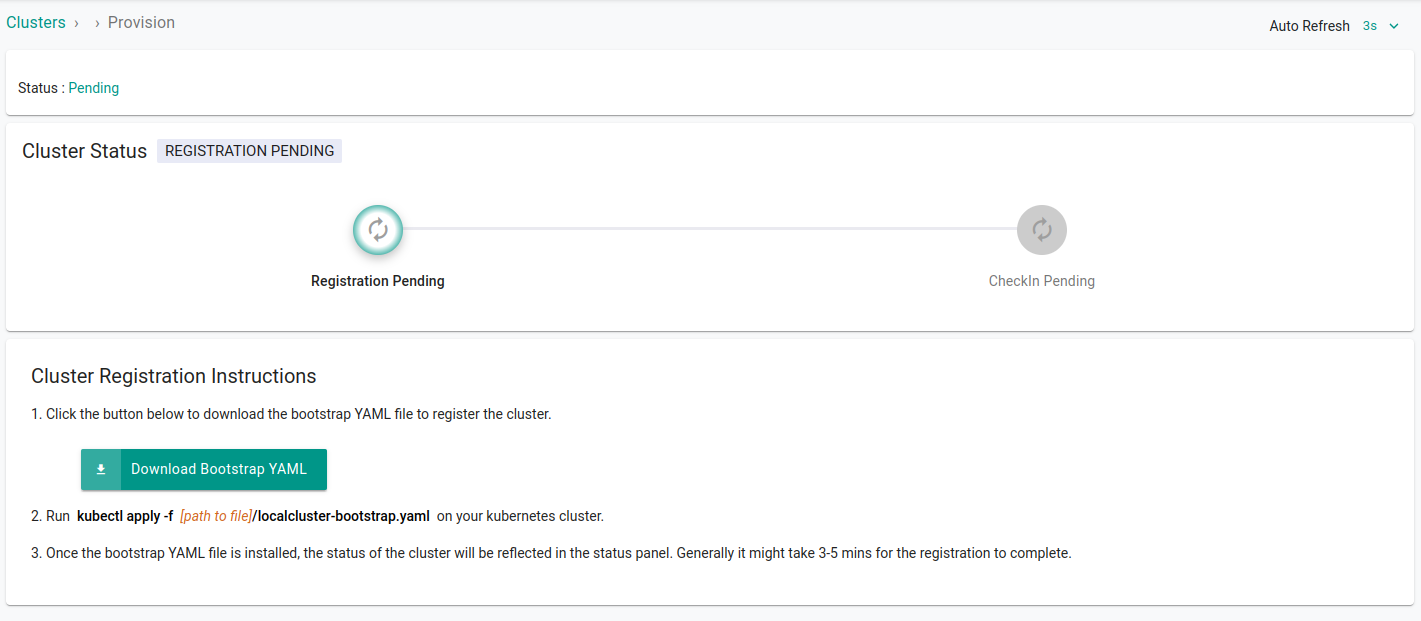
Apply the bootstrap configuration yaml file
kubectl apply -f mylocalcluster.yaml
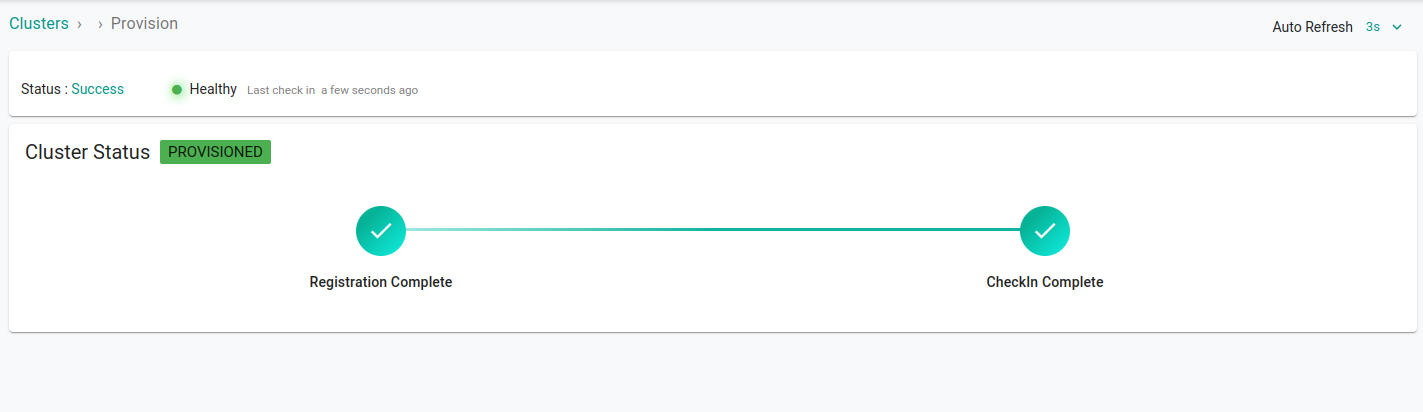
Wait for the changes to take place. On the dashboard you will see that the cluster is imported successfully. It usually takes 3-5 minutes for the status to update.
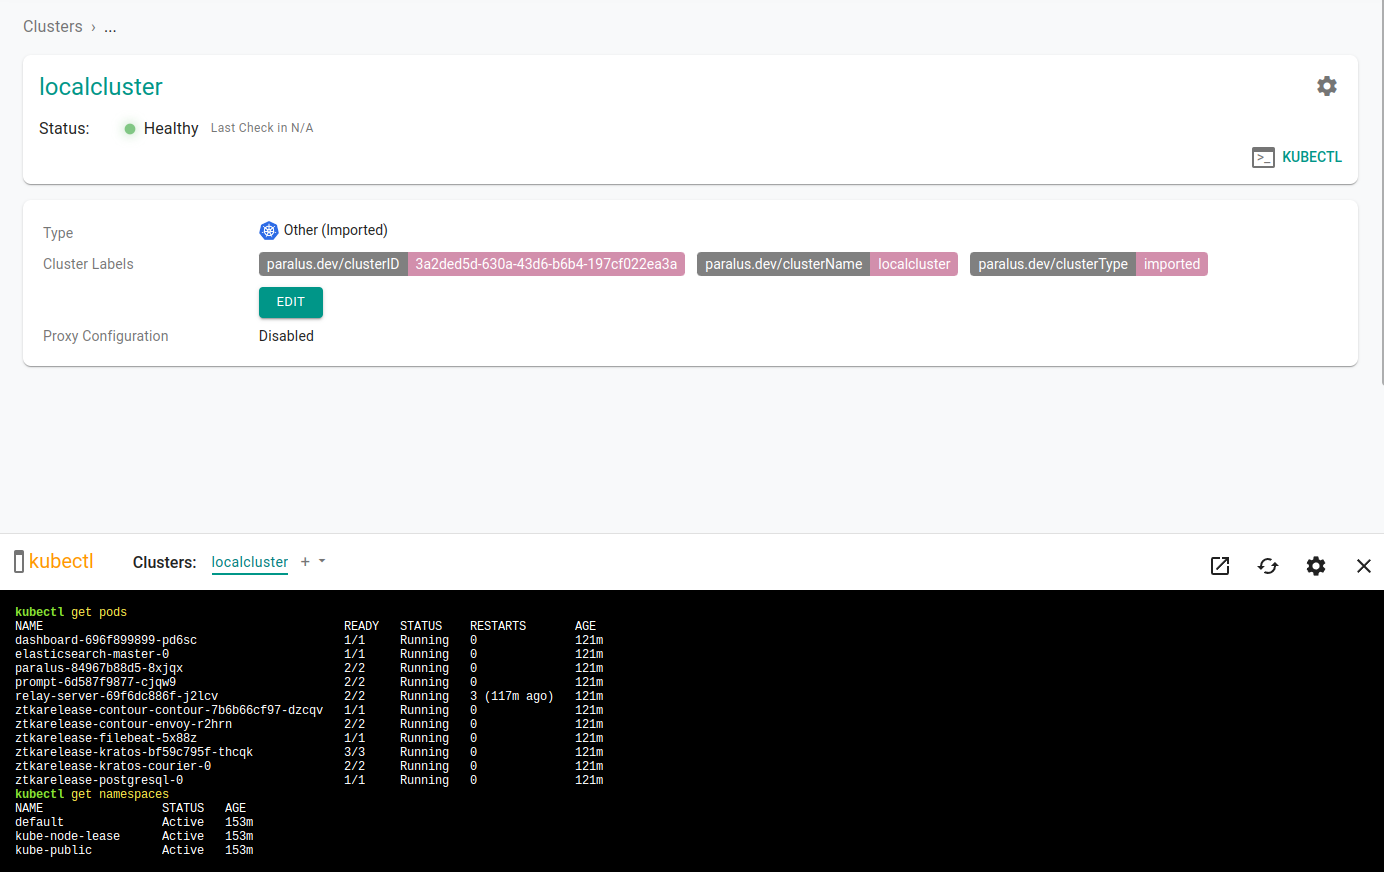
Select your newly imported cluster and click on kubectl to access the prompt and interact with your cluster from the dashboard.
A kubectl console will open in the bottom half of the screen, enter your kubectl commands to interact with your cluster.
Congratulations! You've successfully deployed Paralus on Google Kubernetes Engine (GKE) and imported a local cluster.
Refer to our documentation to learn about various features of Paralus.
