
Kubectl is one of the most widely used tools to work with Kubernetes. The command line tool allows you to deploy applications, inspect and manage resources. It basically authenticates with the control plane for your cluster and makes API calls to the Kubernetes API. In short if you are working with Kubernetes - you will use kubectl the most.
In most modern day scenarios, there are multiple users who are accessing various clusters. This makes it all more important to ensure that every user or group has access to only those resources that they are allowed to. Few ways to achieve this is using namespaces and role based access control. While these are good, most enterprise grade application deployments require something more robust.
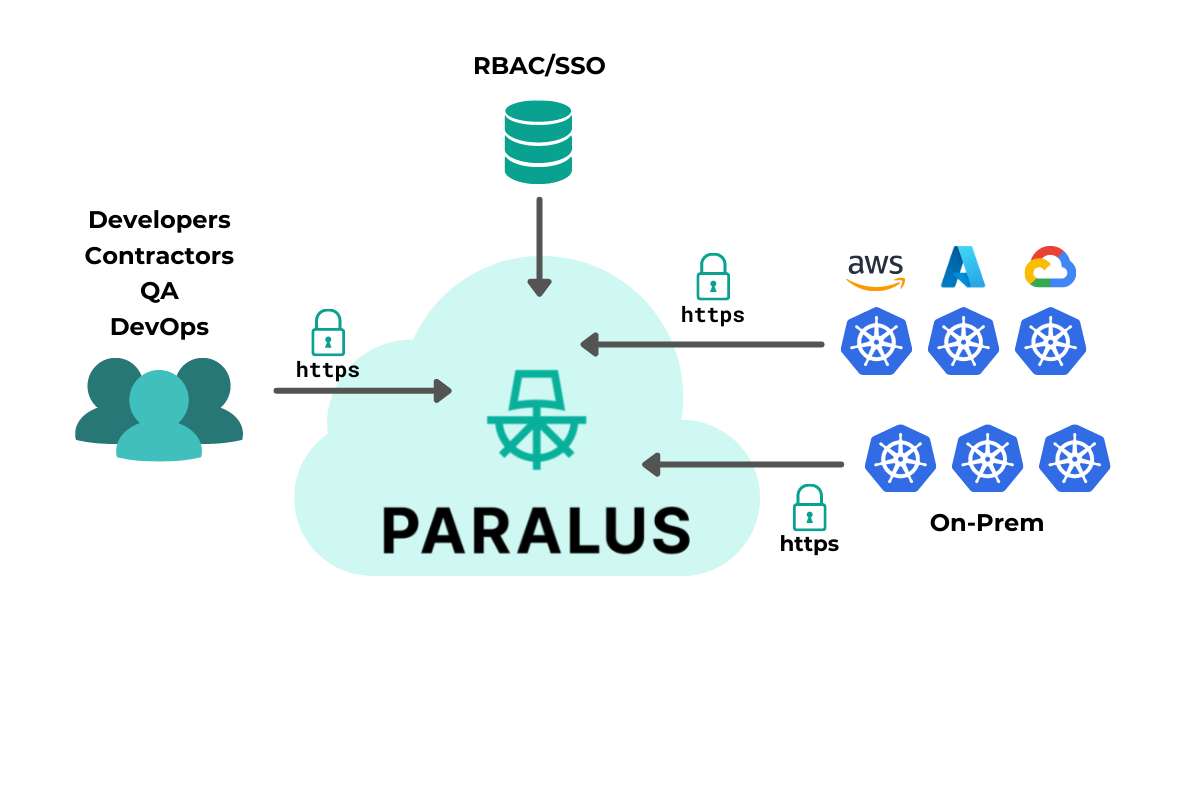
That’s where Paralus comes in. It allows you to configure centralized kubectl access to multiple clusters all from a single dashboard. It allows you to create groups, assign projects and users and provide access. In this blog post, we’ll show you how to import different clusters to Paralus and configure access to them. All of this with zero trust principles built in.
The Use Case
The goal of this blog post is to help understand how you can import multiple clusters and manage access to them from a single dashboard. In this sample use case we will have three clusters deployed in different environments. Paralus will be deployed to a cluster on Azure, two other clusters, one hosted on onprem, one localhost kind cluster and the other on Google Cloud. We’ll import these clusters into Paralus and configure centralized kubectl access to them.
Setting Up Paralus
The first and foremost step here is to install Paralus. Setting up Paralus is easy with the provided helm charts. Based on the environment you are setting up Paralus on, you can follow the Paralus installation documentation.
We installed Paralus on AKS, so we created a new cluster and installed paralus using the following commands
helm repo add paralus https://paralus.github.io/helm-charts
helm install myrelease paralus/ztka \
 -f https://raw.githubusercontent.com/paralus/helm-charts/main/examples/values.dev-generic.yaml \
 --set fqdn.domain="chartexample.com" \
 -n paralus \
 --create-namespace
Make sure to update the fqdn.domain value with the actual domain that you’d be using. Once the installation is complete, you can configure the DNS records and access the dashboard.
Importing A Cluster
Once you are within the dashboard, you can start by creating a new project or use the existing default project. Within the project, you can import a new cluster. You can follow the below steps to import an existing on prem cluster or any other cloud cluster:
Click on Import Cluster
In the new dialog,
Choose
Data Center/Edgeas the environment andOtheras Kubernetes distribution. Use this for importing a cluster from your onPrem or local host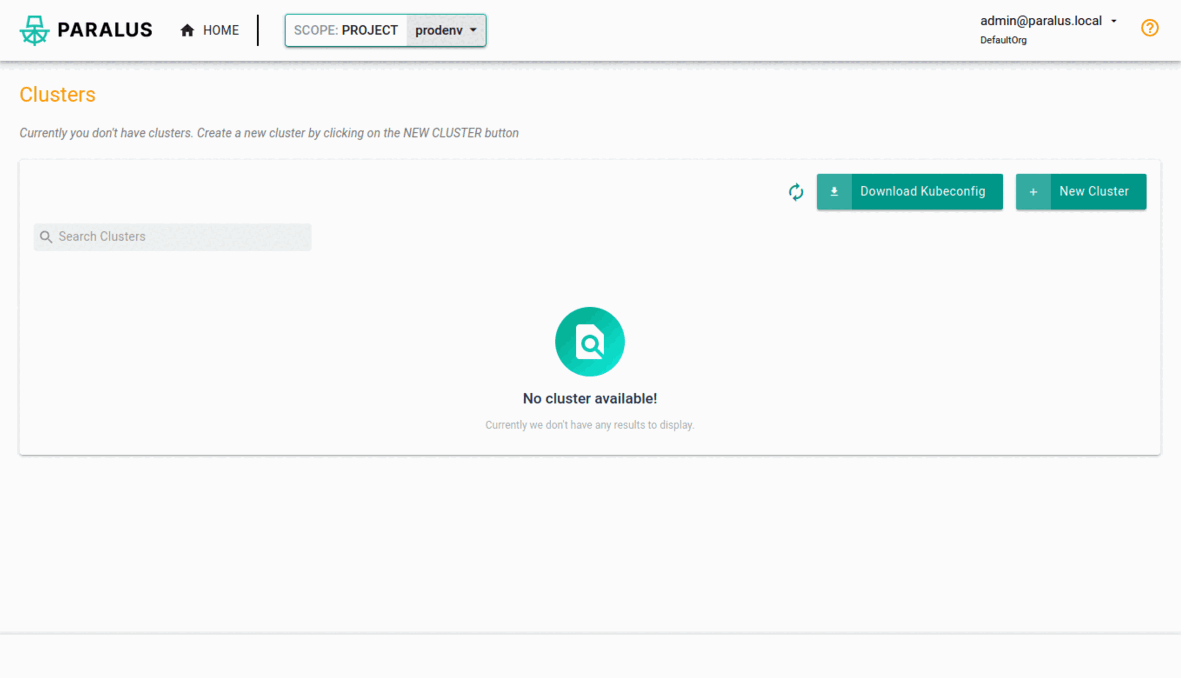
Choose
Public Cloudas the environment andGKEas Kubernetes distribution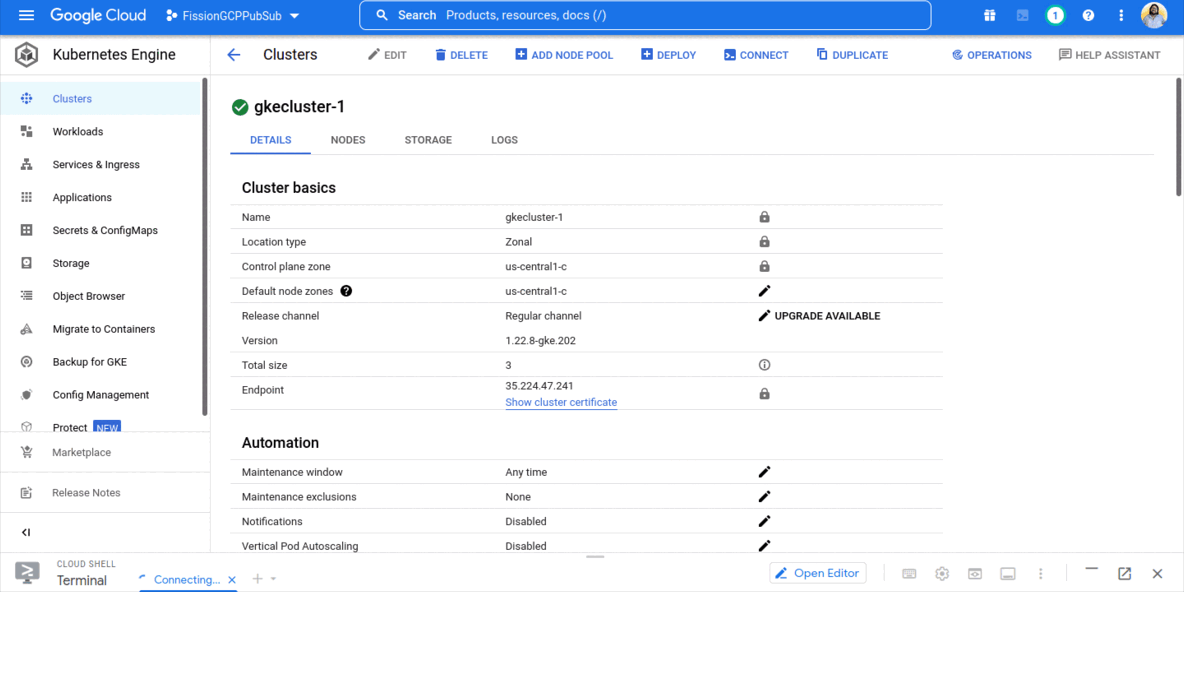
Provide a name and description and continue
Leave the general and advanced settings as is and move to the final stage
Download the generated
bootstrap.yamlfileApply this file in the cluster that you want to import to Paralus
kubectl apply -f bootstrap.yamlAfter Paralus is up and running in your target cluster, it will be successfully imported to Paralus.
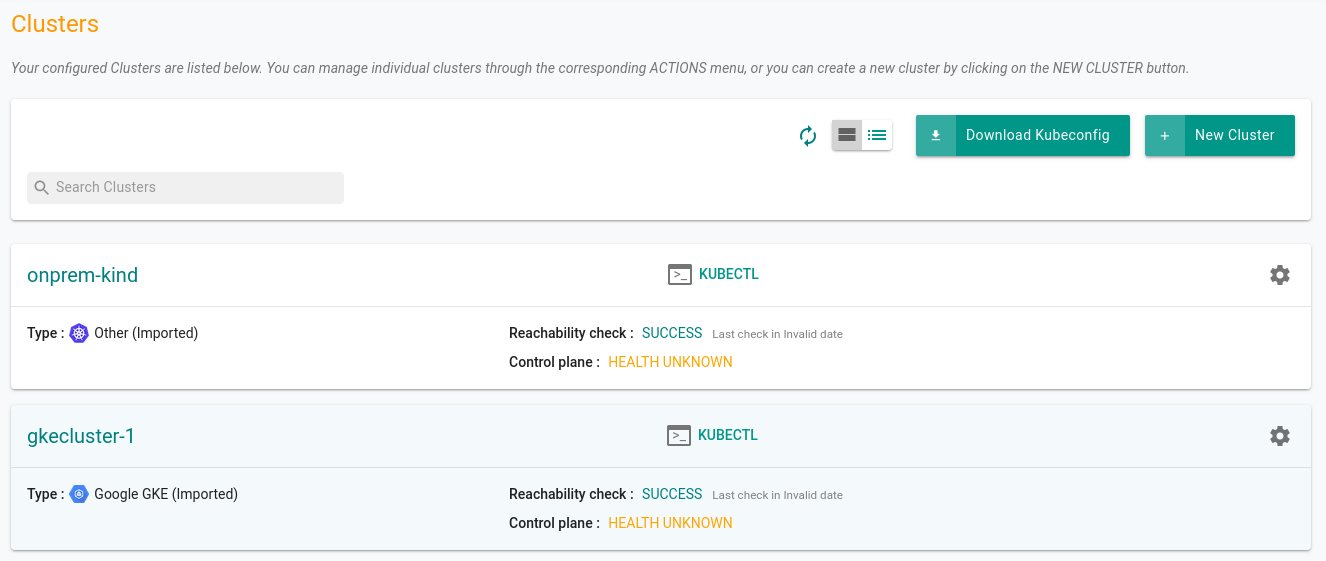
Once imported, you can navigate to the project and view the clusters. You can test if the clusters are configured correctly or not, you can execute kubectl commands from the prompt.
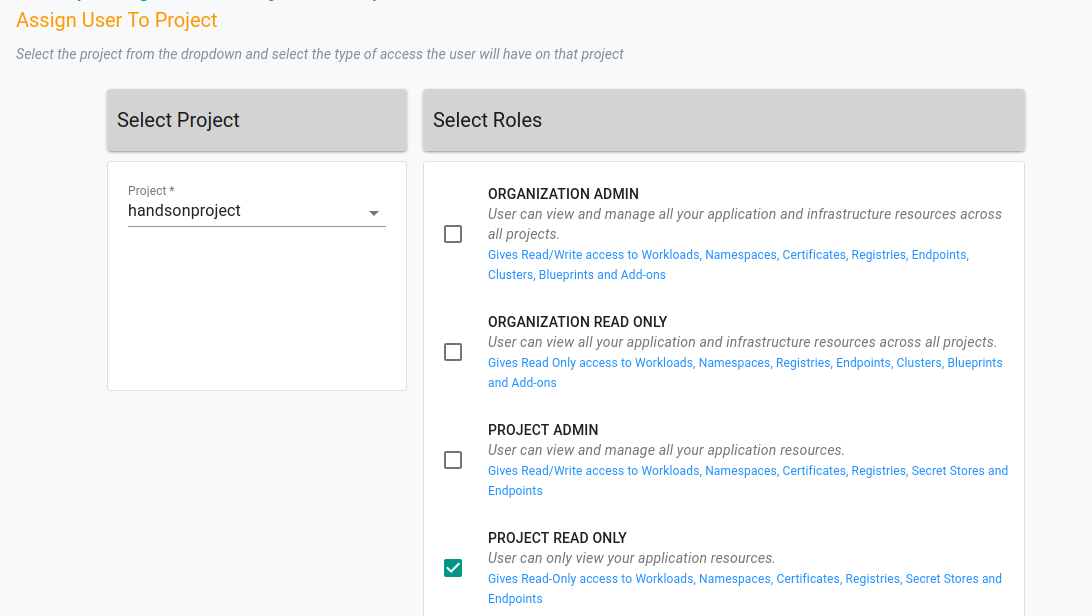
Configuring Groups & Users
The next step is to create a new Group and assign this project to the group. It’s easier to manage permissions and roles via groups rather than doing it for every individual user.
So create a group, add the project and choose the permissions. We can choose project_readonly to provide only read only permissions or anything else based on your use case.

Once configured, you can ask the users to re login to verify the access. The users assigned to the project will be able to access the clusters in read only mode and will not be able to create, edit or delete any resource in the cluster.
Since the project we created had both the clusters that we imported - GKE, local & on-prem kind cluster - readonly permission is configured to all of them. Thus allowing an admin to configure centralized kubectl access to multiple clusters from a single dashboard.
Below is how your cluster list within the project will look like.
Next Steps
So that was how you can import multiple clusters from different environments to Paralus and configure kubectl access to them. While this was a simple use case, you can very well configure it for your production environments as well
You can create multiple groups for your development and QA teams and assign users to the group along with the project with the clusters. If you have an IdP configured, then you don’t need to work on the group assignments manually when a new user is added/removed from the organization. Paralus will automatically add/remove permissions for various users to the clusters.
If you are looking forward to testing or deploying Paralus, feel free to reach out to us via our Slack Channel. Our team and community is there to support you!
