Keycloak
In this document, we'll show you how to use Keycloak as an Identity provider for Paralus. This will allow your users to login via Keycloak and access Paralus. Below is the list of items that we will cover in this document:
Creating a Keycloak SSO Application
Login to your Keycloak account and navigate to the Realm and select the Clients and click on the button Create client.
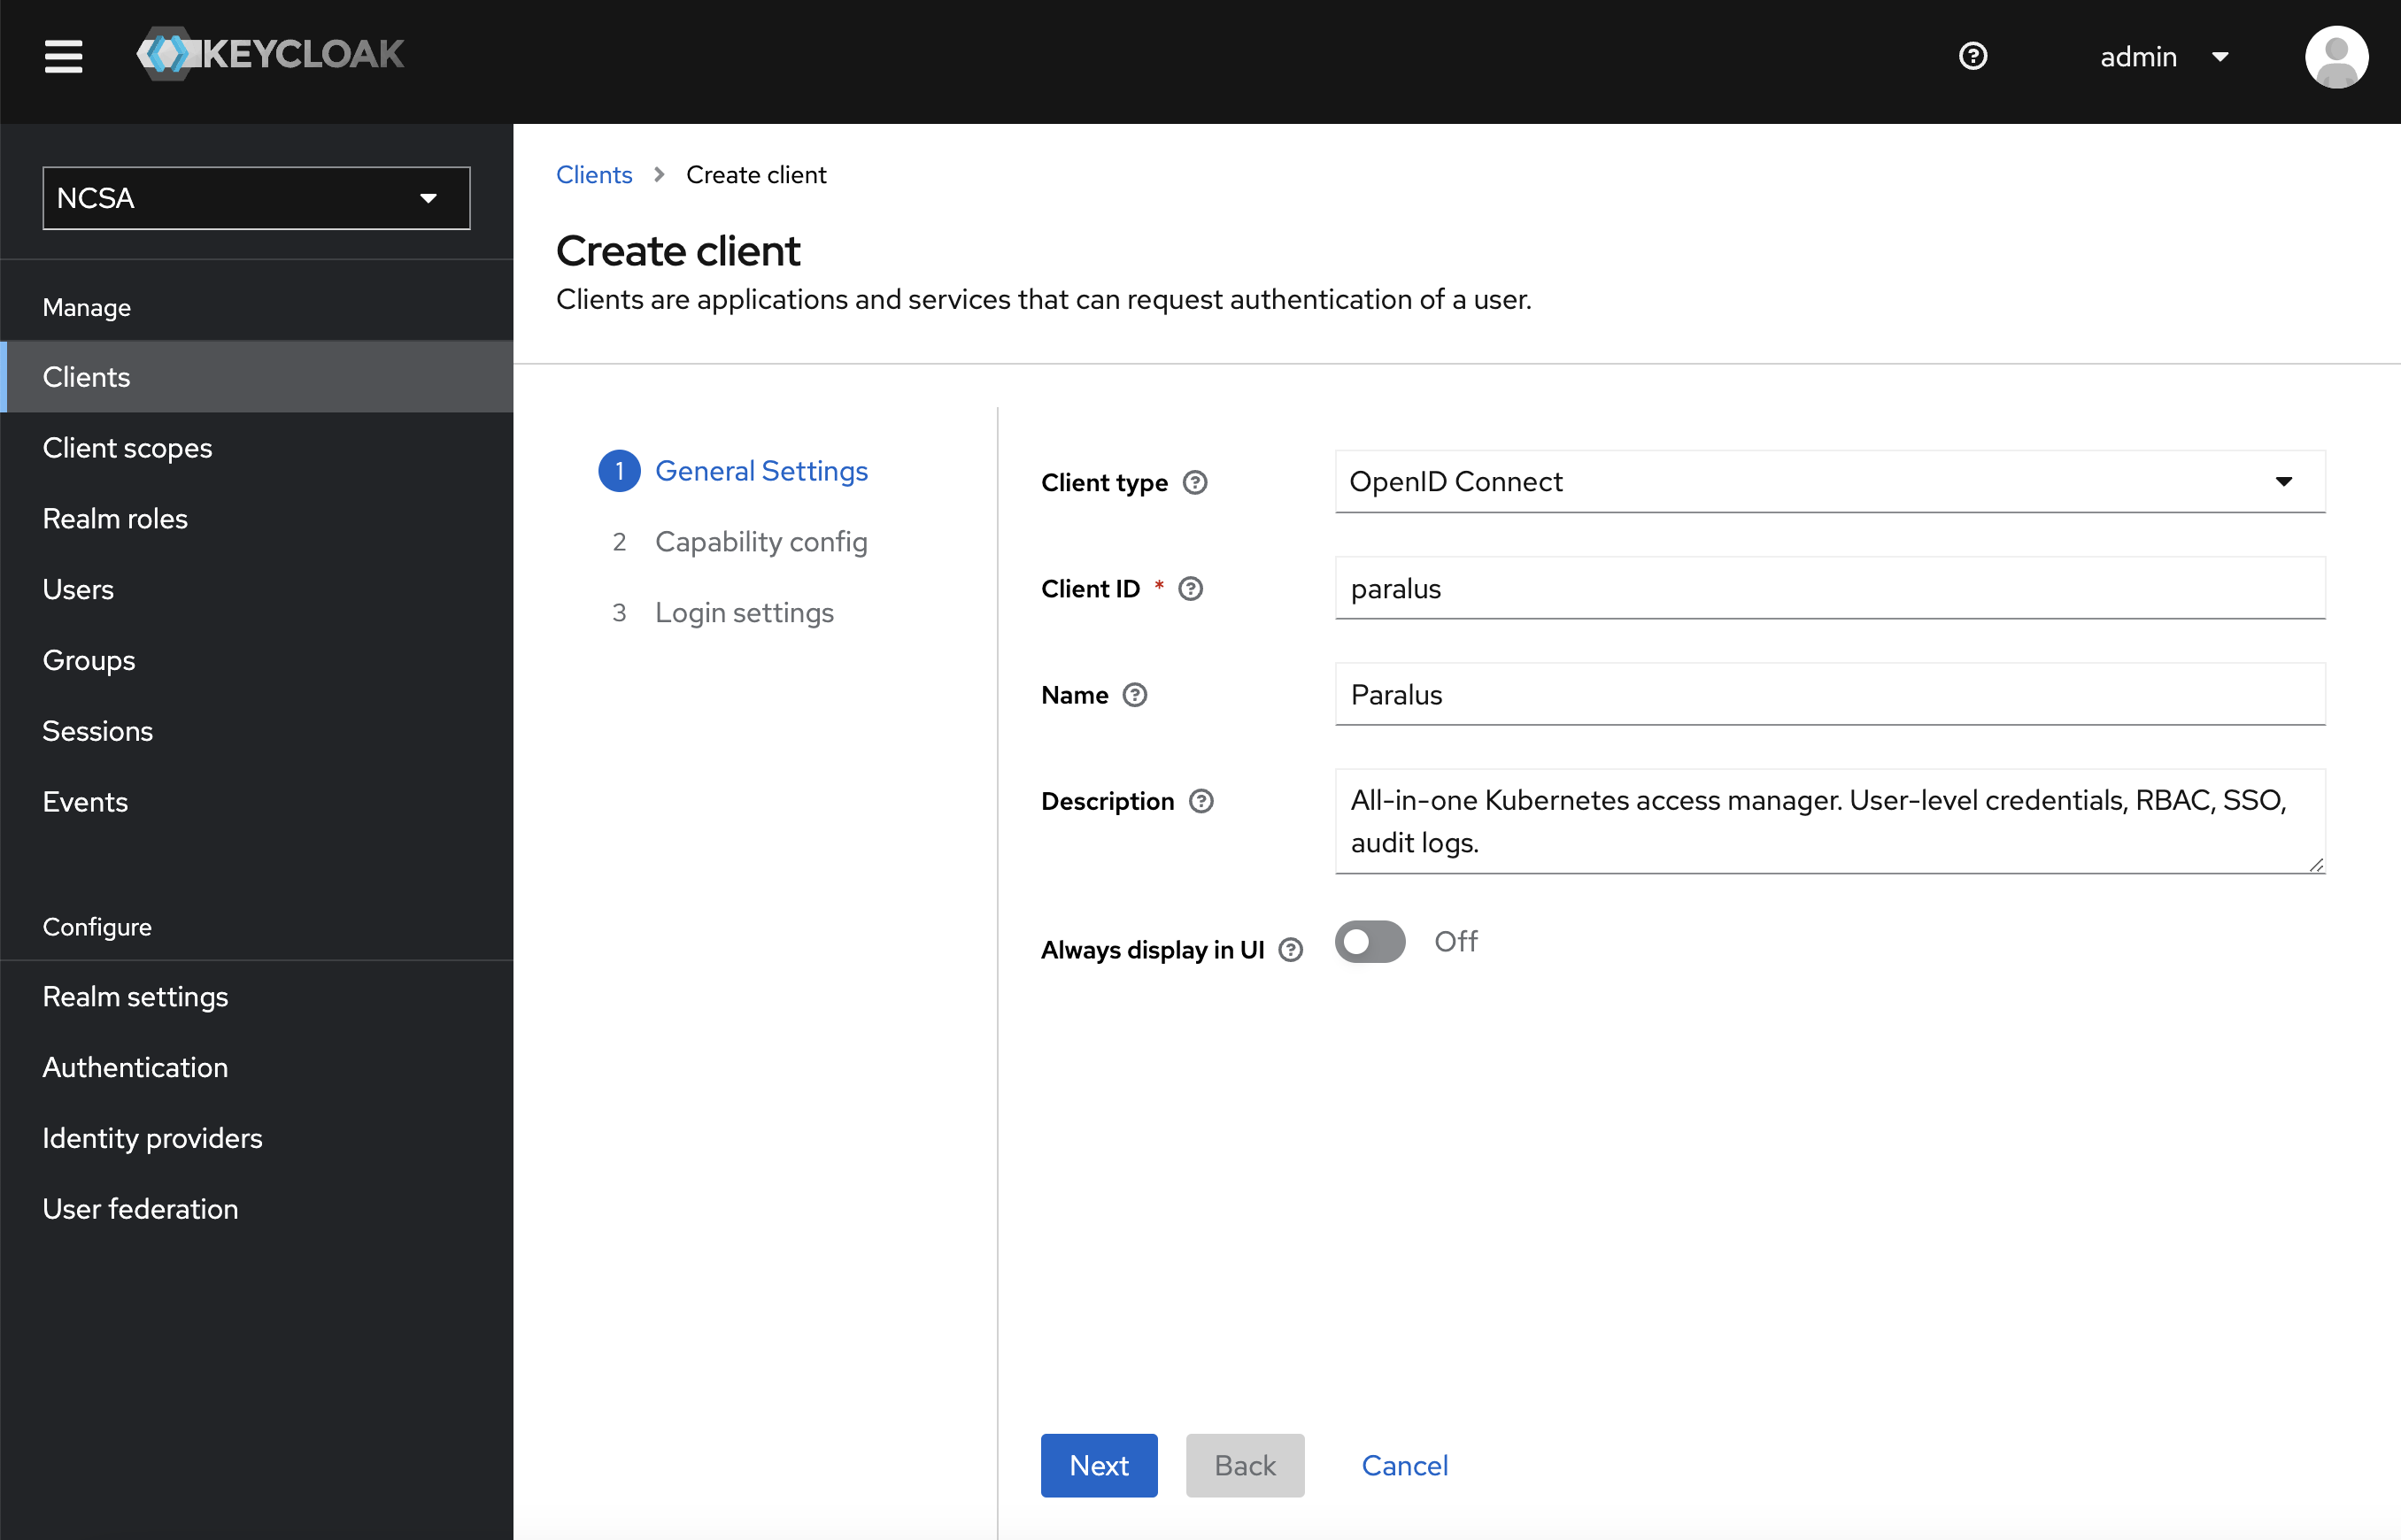
Select OpenlD Connect for the Client type, and add the name for a Client ID (this is used later in Paralus) as well as an easy name and description. Once complete select Next to continue to the next screen.
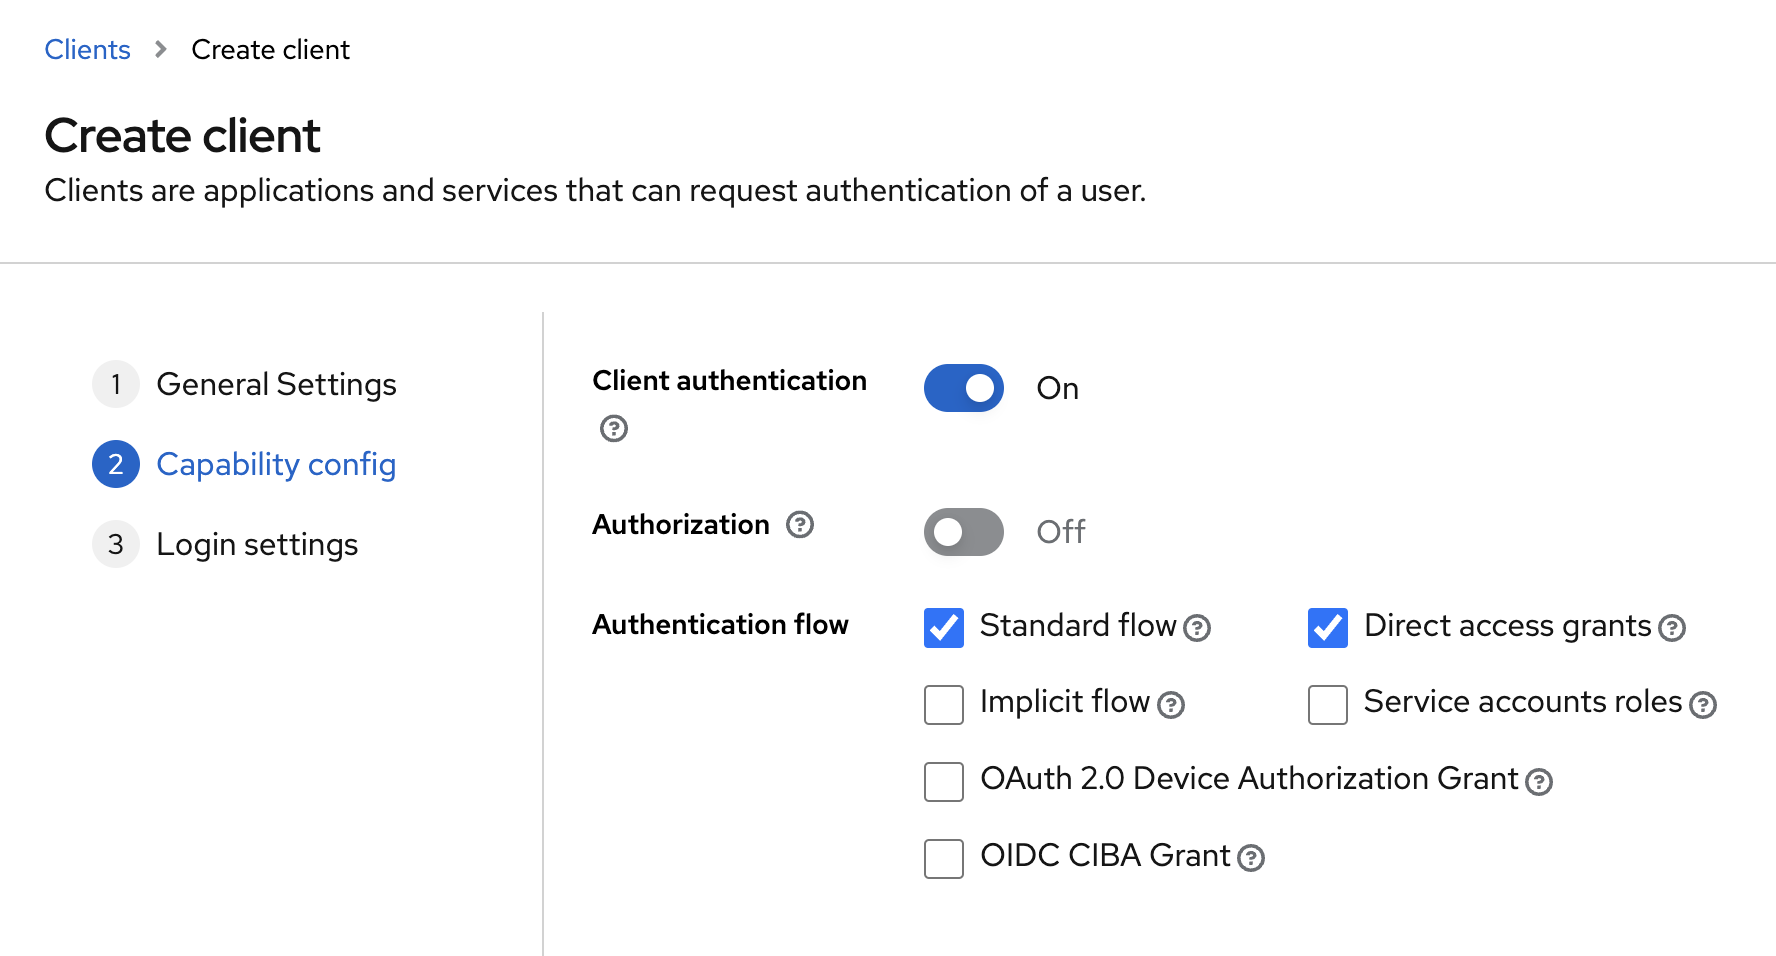
On the next screen make sure to turn on Client authentication. You can leave the rest as defaults. and select Next.
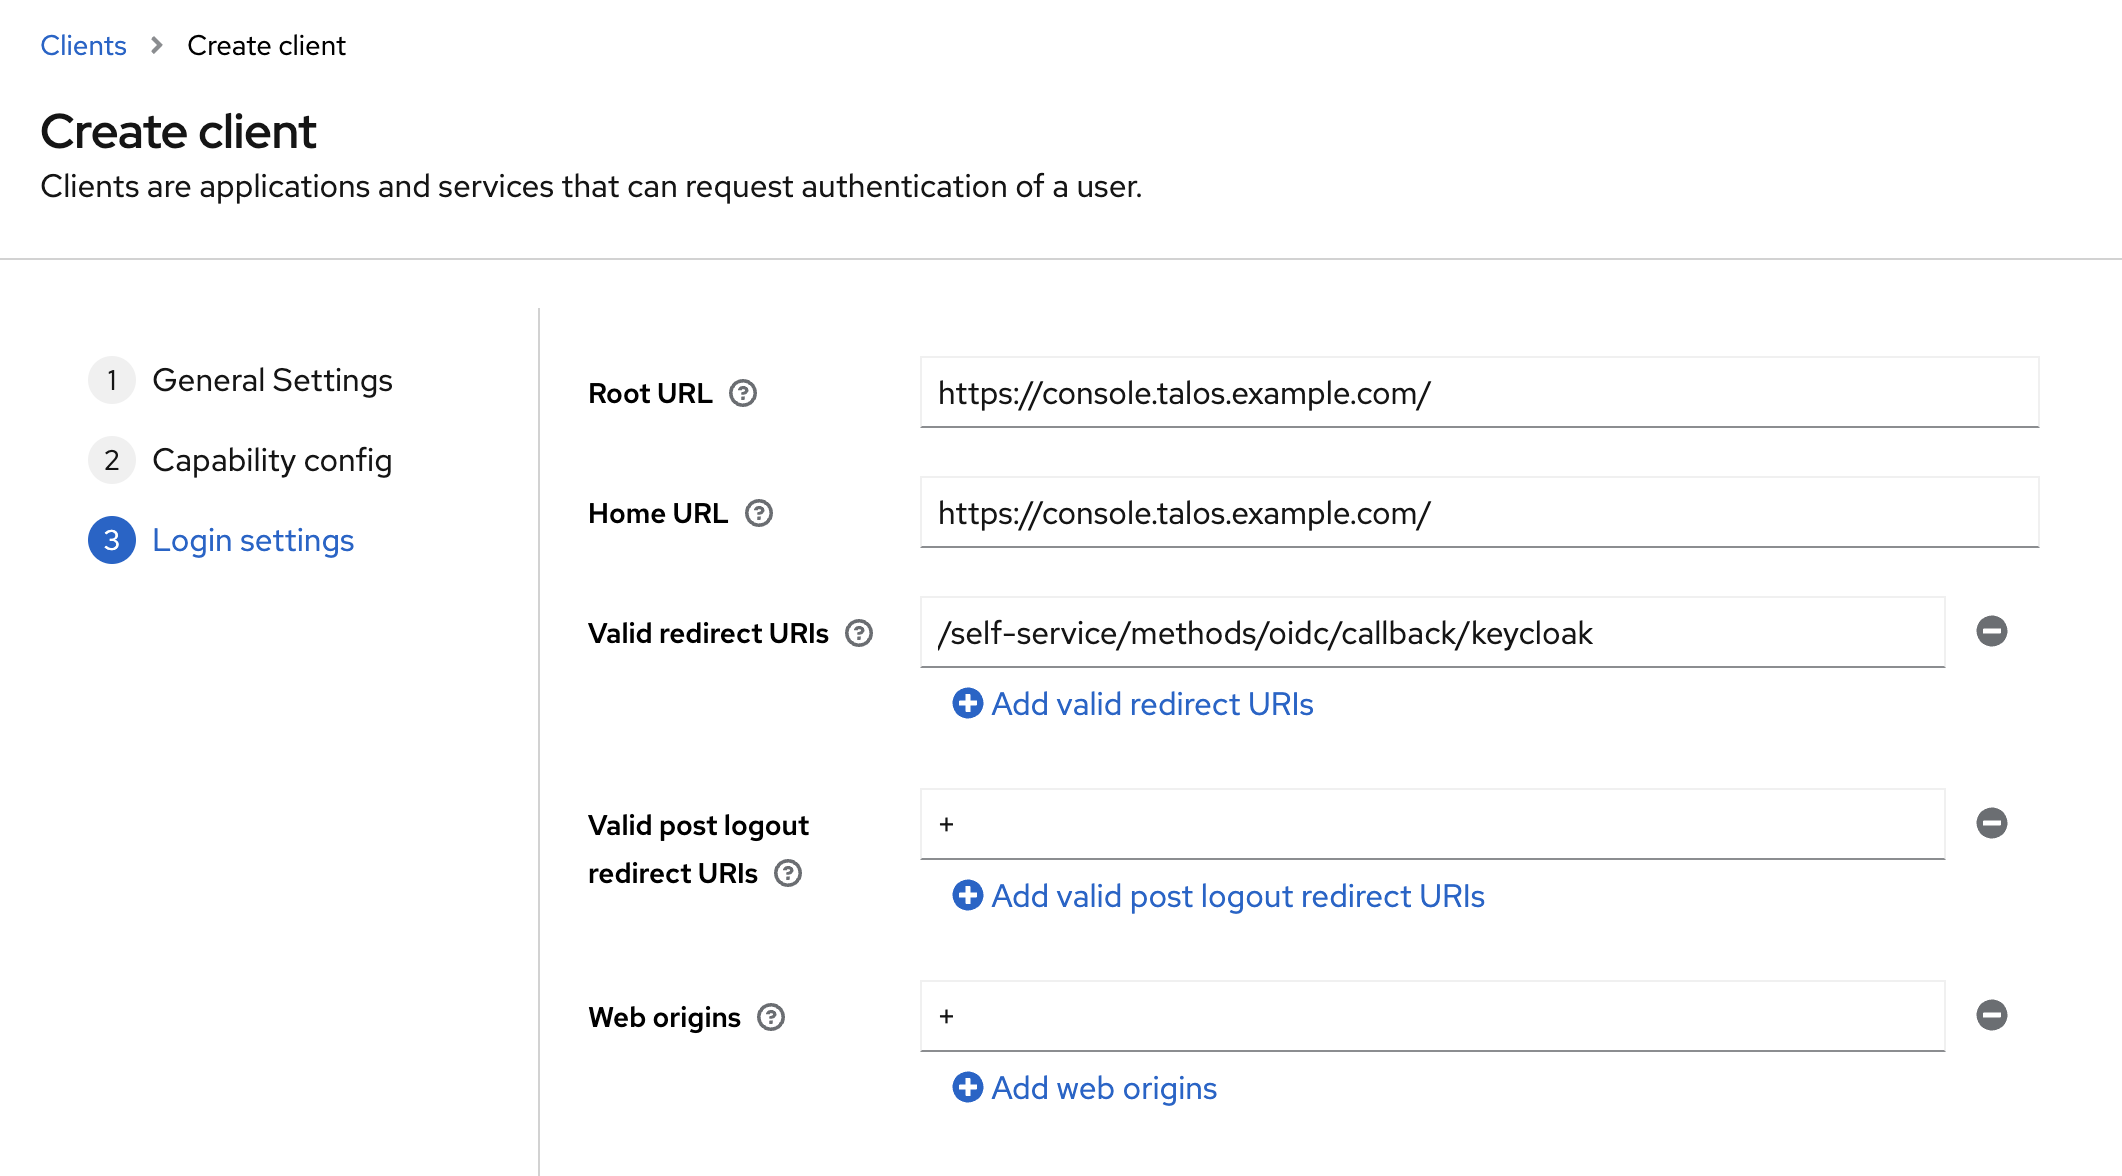
Specify the root url for paralus, this will allow you to use relative paths for the rest. Leave the Application Callback URL empty for now and Save the application. Next you select the Credentials tab to copy the client-secret:
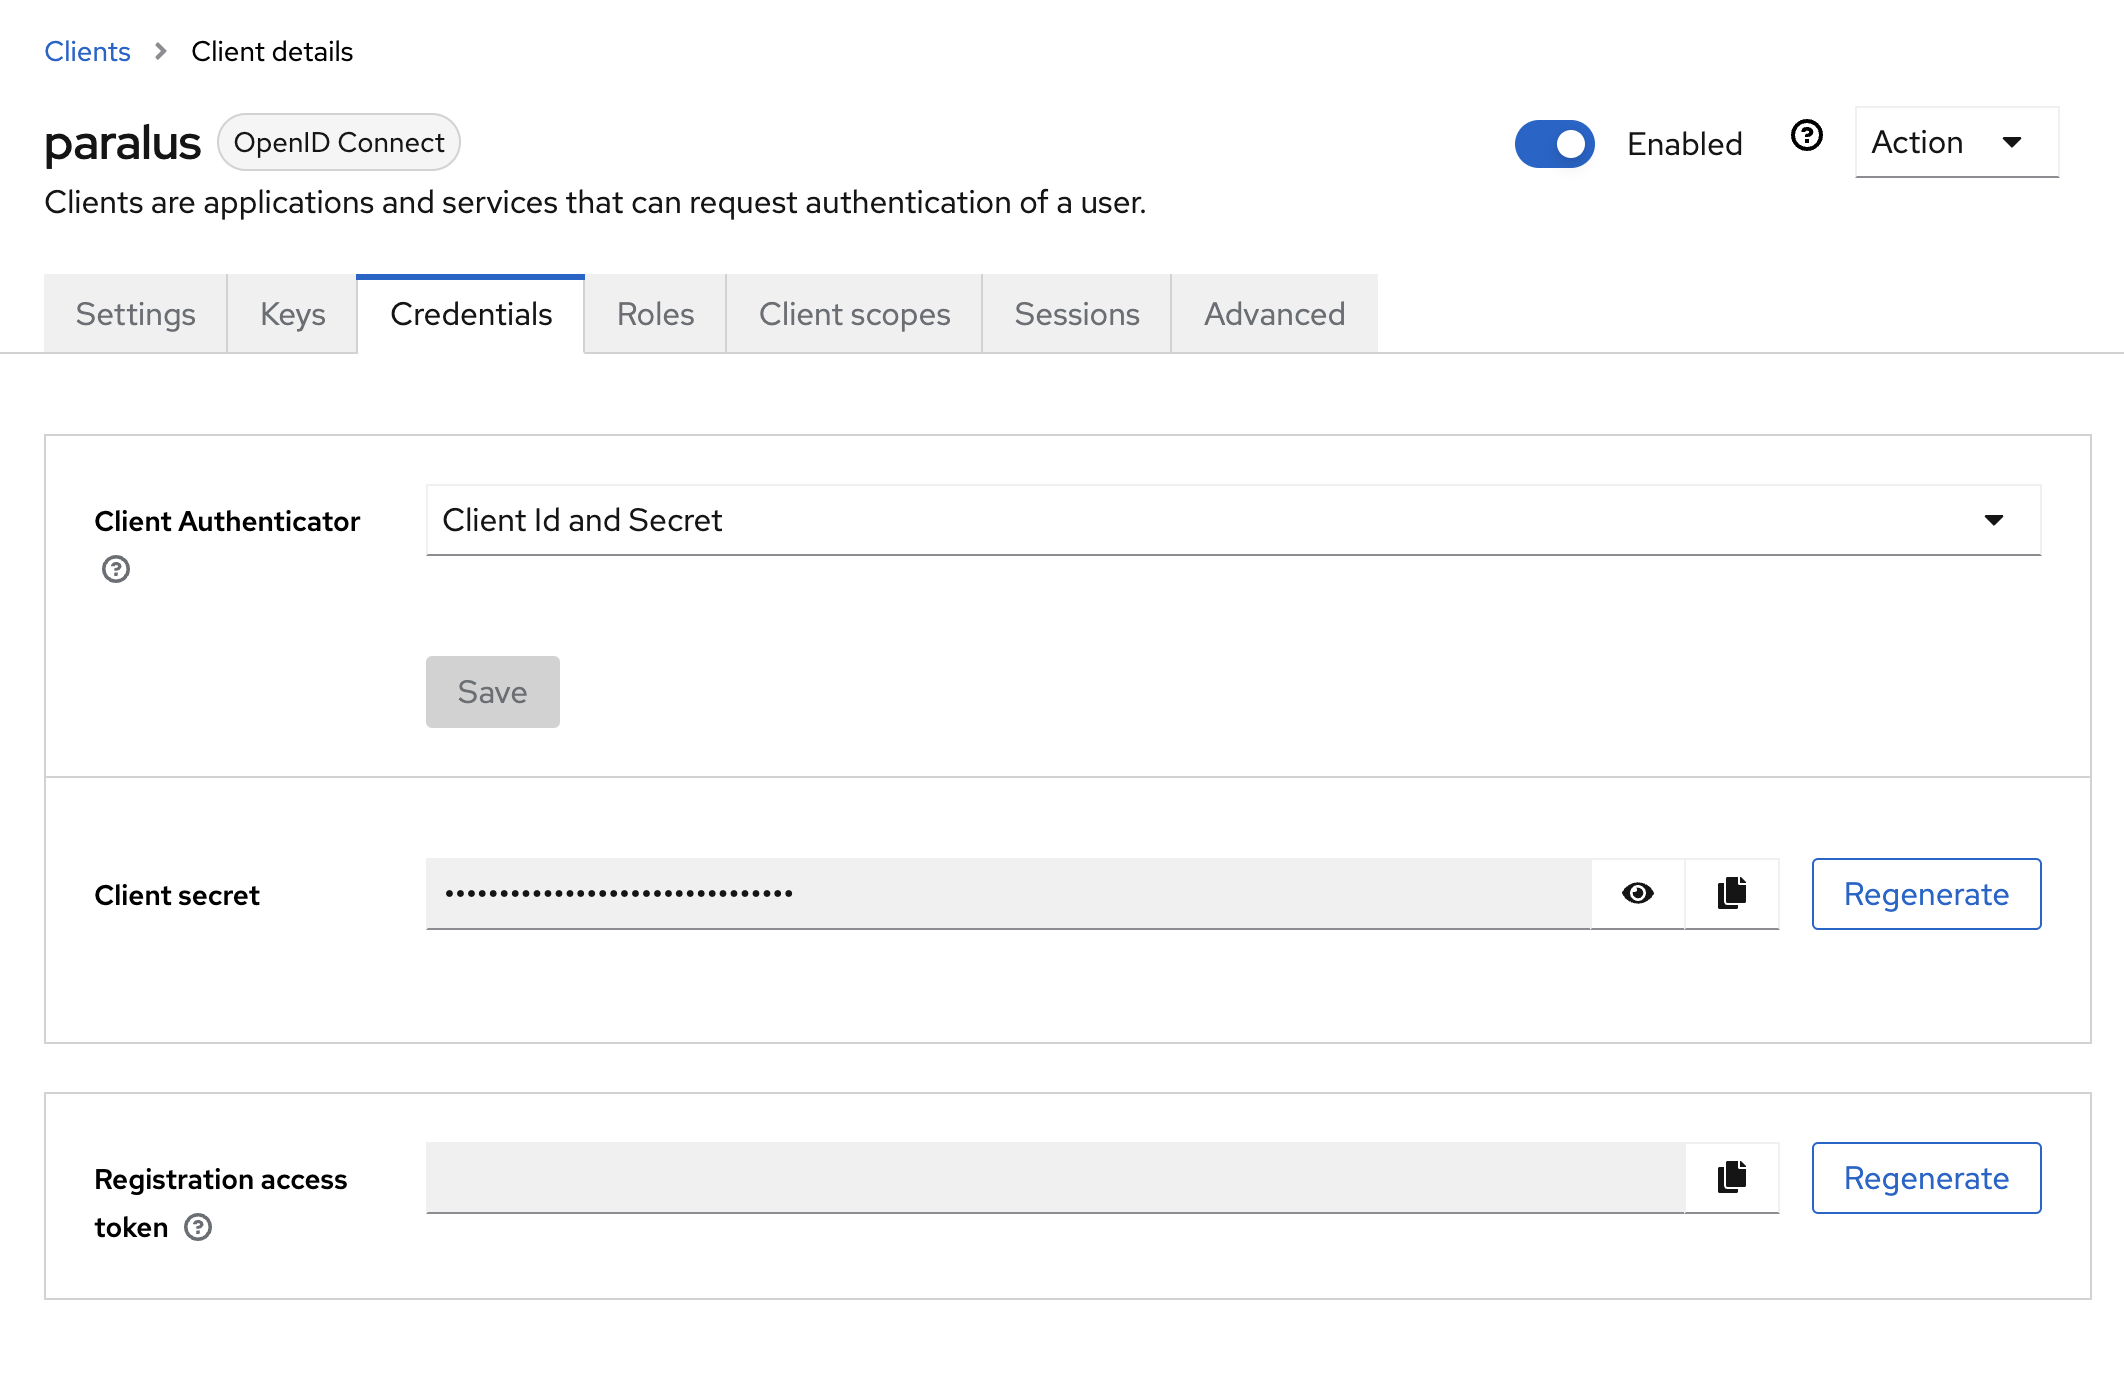
You can either look at the secret, or copy the secret. You can do this at any point, and if you believe the client secret is compromised, you can use Regenerate to create a new secret.
Add a custom groups claim
Paralus comes with the in-built functionality for mapping Identity provider (IdP) groups to Paralus. This makes access management simpler. As an administrator, you don't need to manage access for an individual user but for a group of users.
To map the groups correctly, the group names in Keycloak and Paralus must be the same. This way, the IdP users belonging to a group can access Paralus resources based on the permissions assigned to the group in Paralus. For example, you create a group called DevTeam in Paralus and the same group in Keycloak as well. Assign permissions to the Paralus group and add users to the Keycloak group. Now, when an IdP user belonging to the DevTeam group logs into Paralus using Keycloak, they will inherit the permissions set for the group. If you use another Identity provider, or User federation, in Keycloak (for example LDAP), it can copy those groups to Keycloak and thus to Paralus.
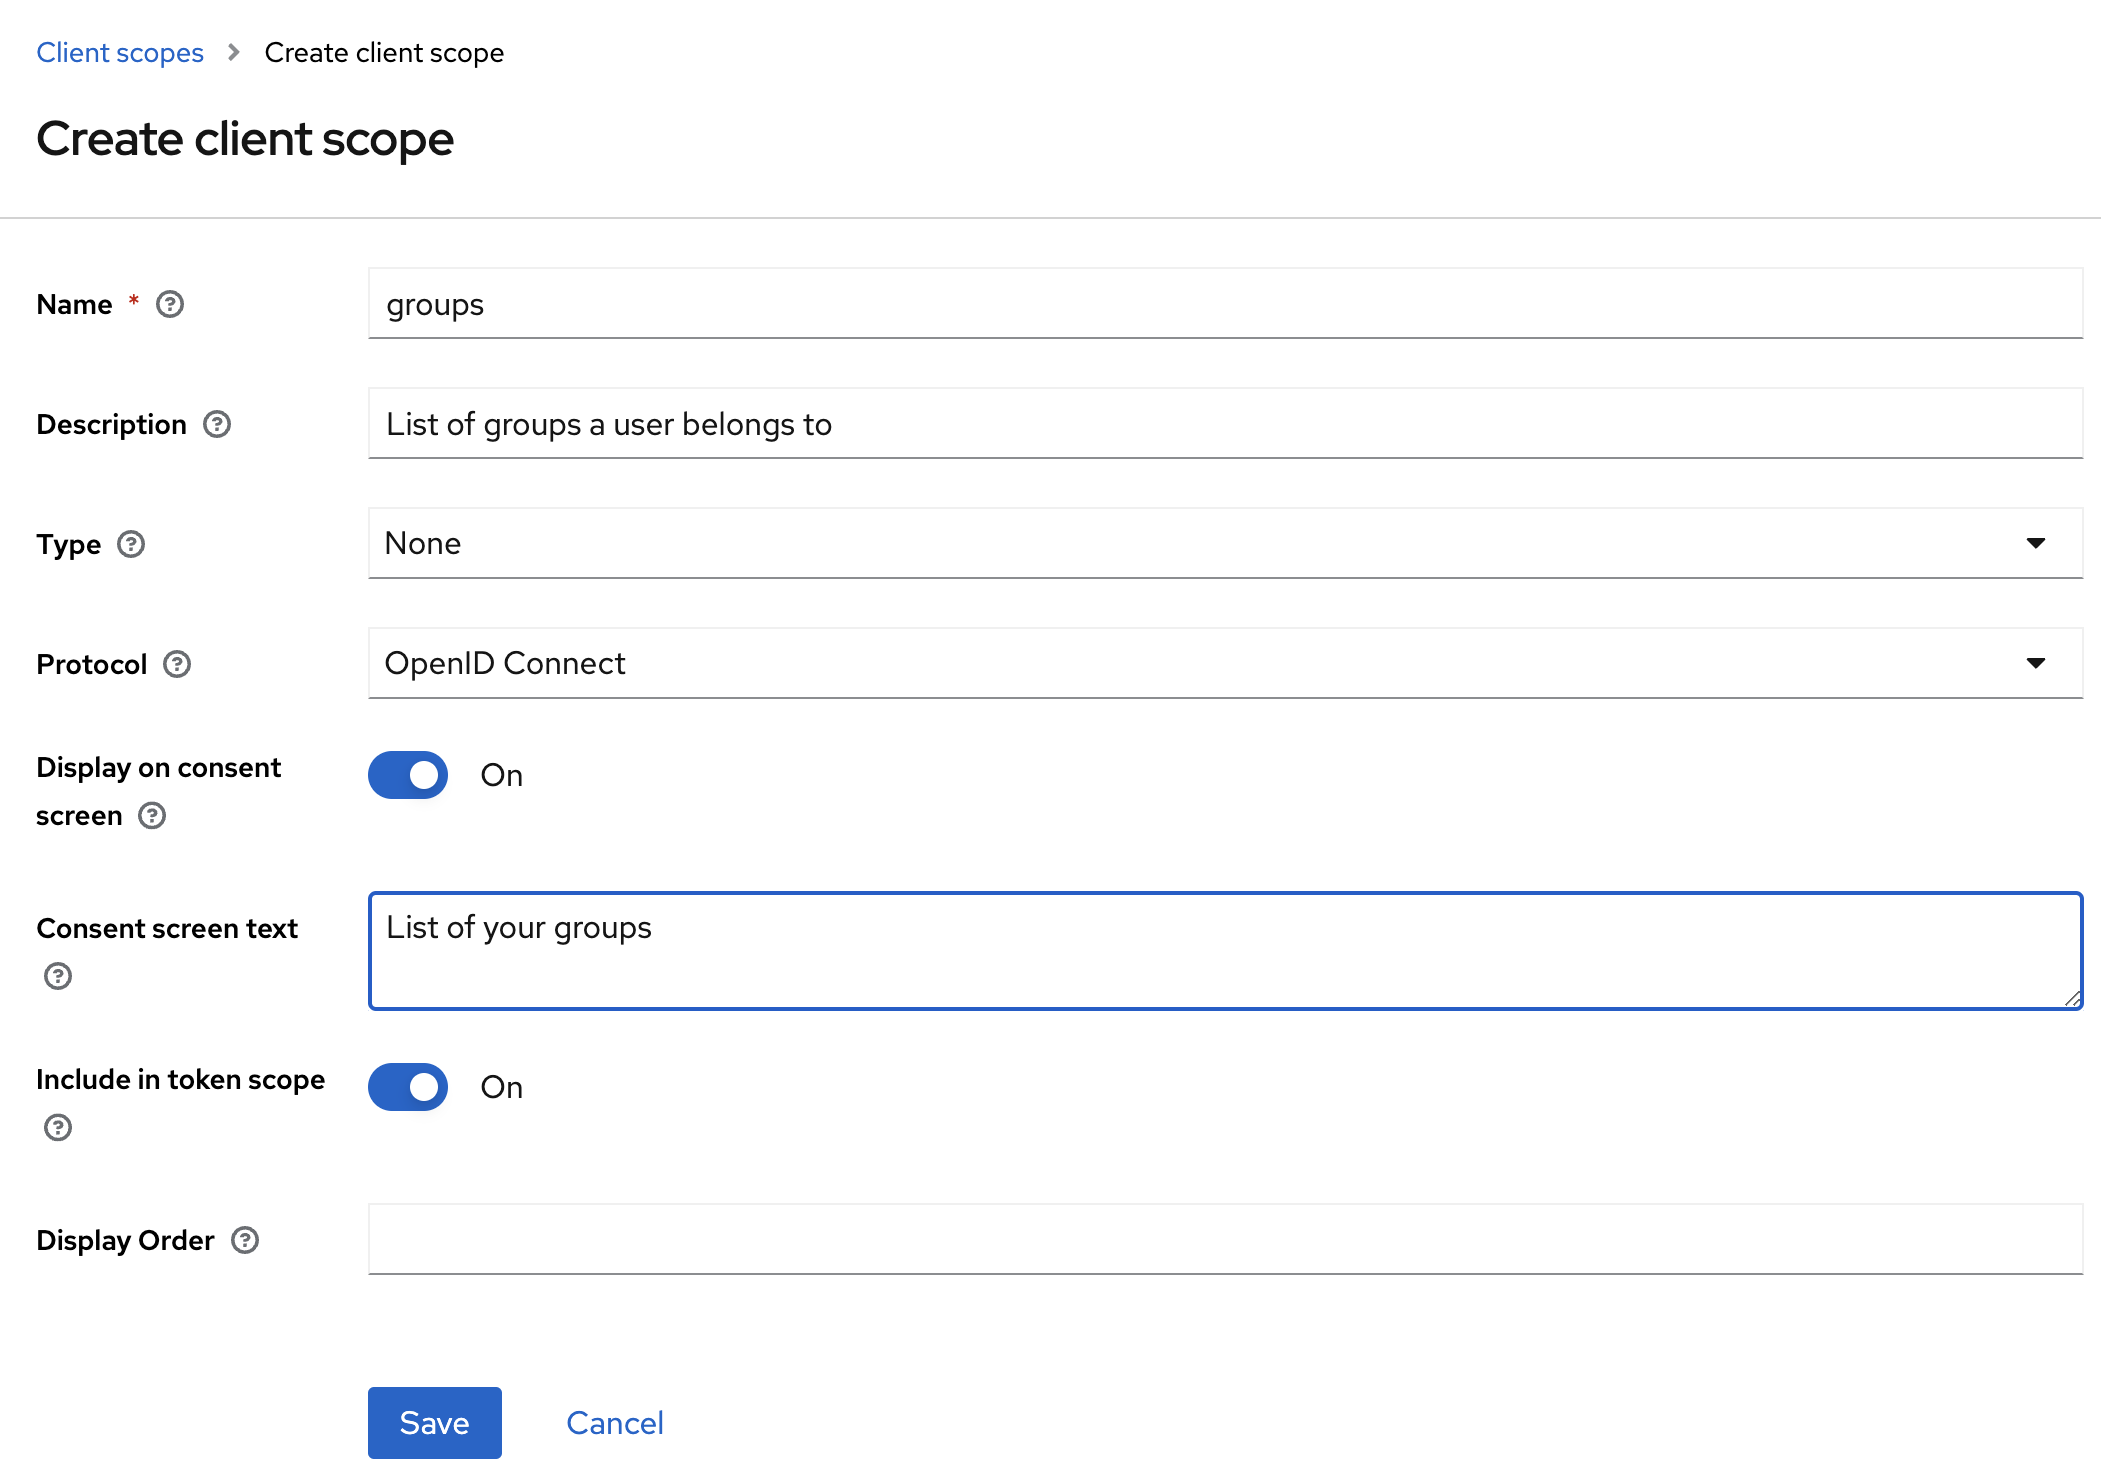
Keycloak by default does not return user group information in OIDC authentication event. You either need to add a custom claim in Keycloak authorization server that provides groups data or you need to mark it as a default Client scope. To create the new Client scope we select that from Client scopes in the Realm, and use the button Create client scope.

Finish the screen and create a new scope called groups, once finished filling out save the scope.
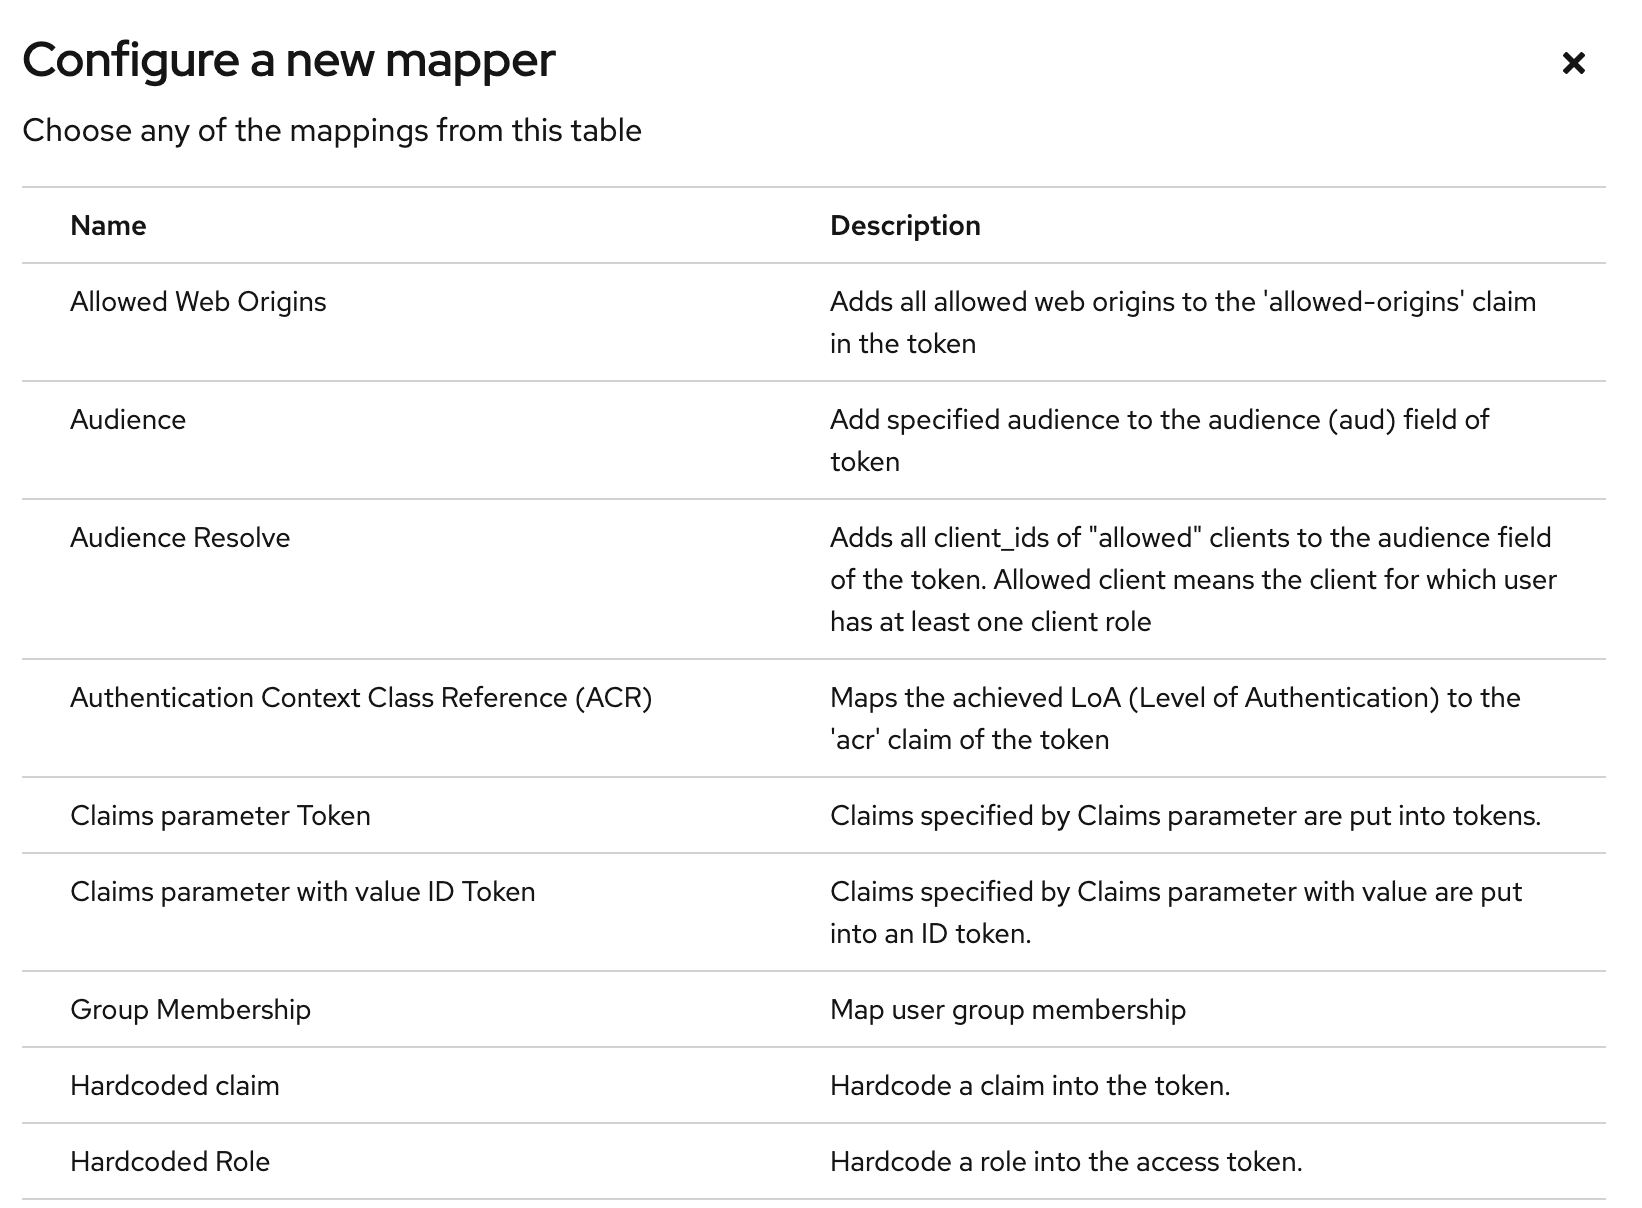
Once saved select the Mappers tab to create a mapper to the Client scope. Use the Configure a new mapper button and select the Group Membership option.
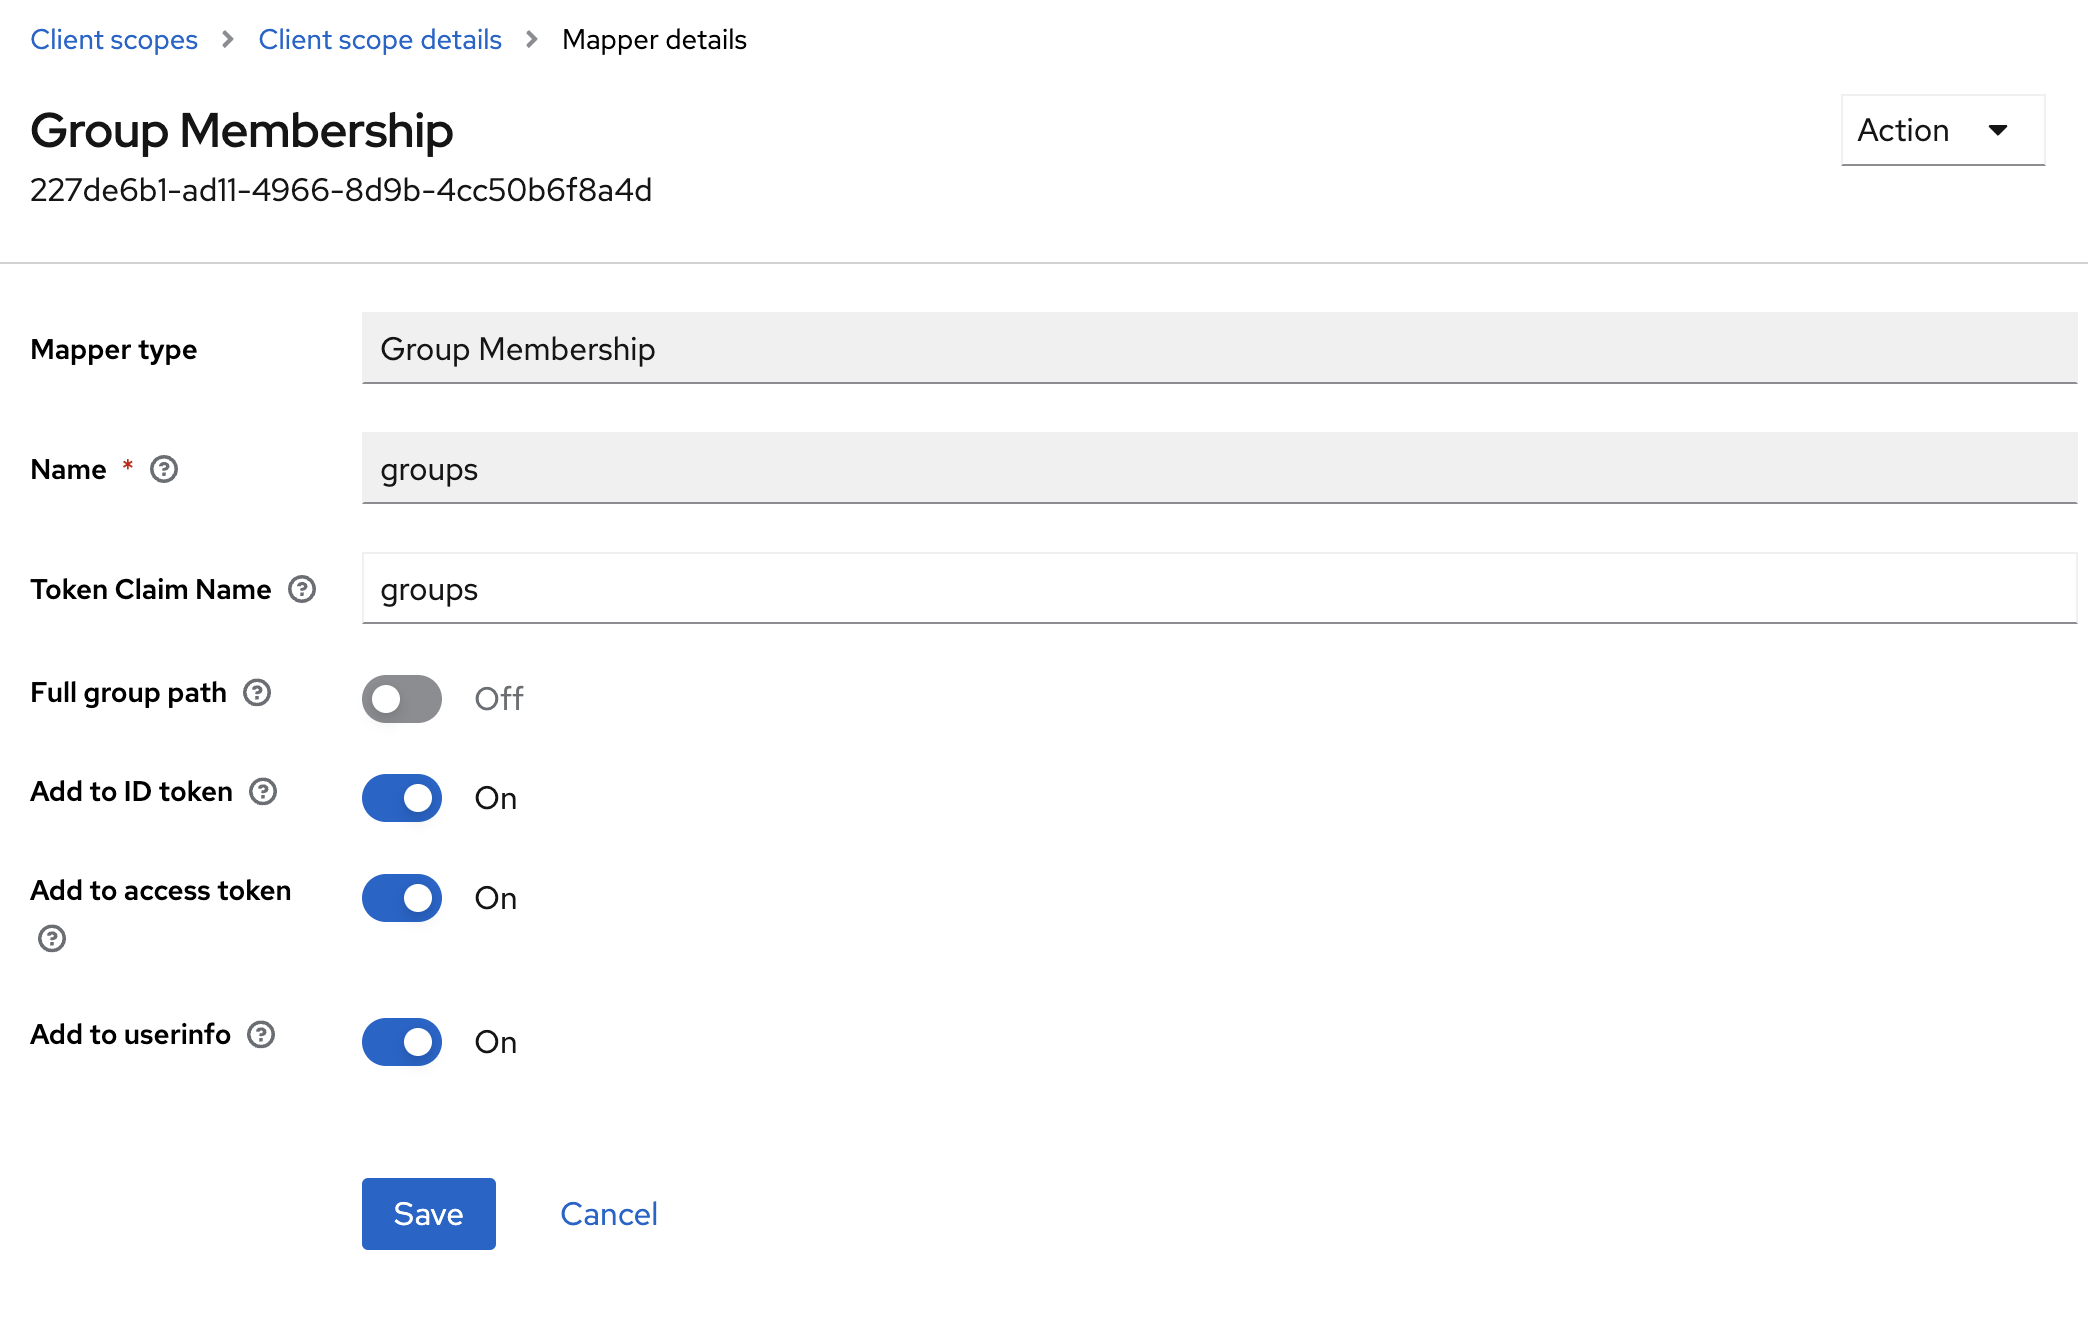
Set the name to groups, and disable the Full group path. Save and you are done defining the group.
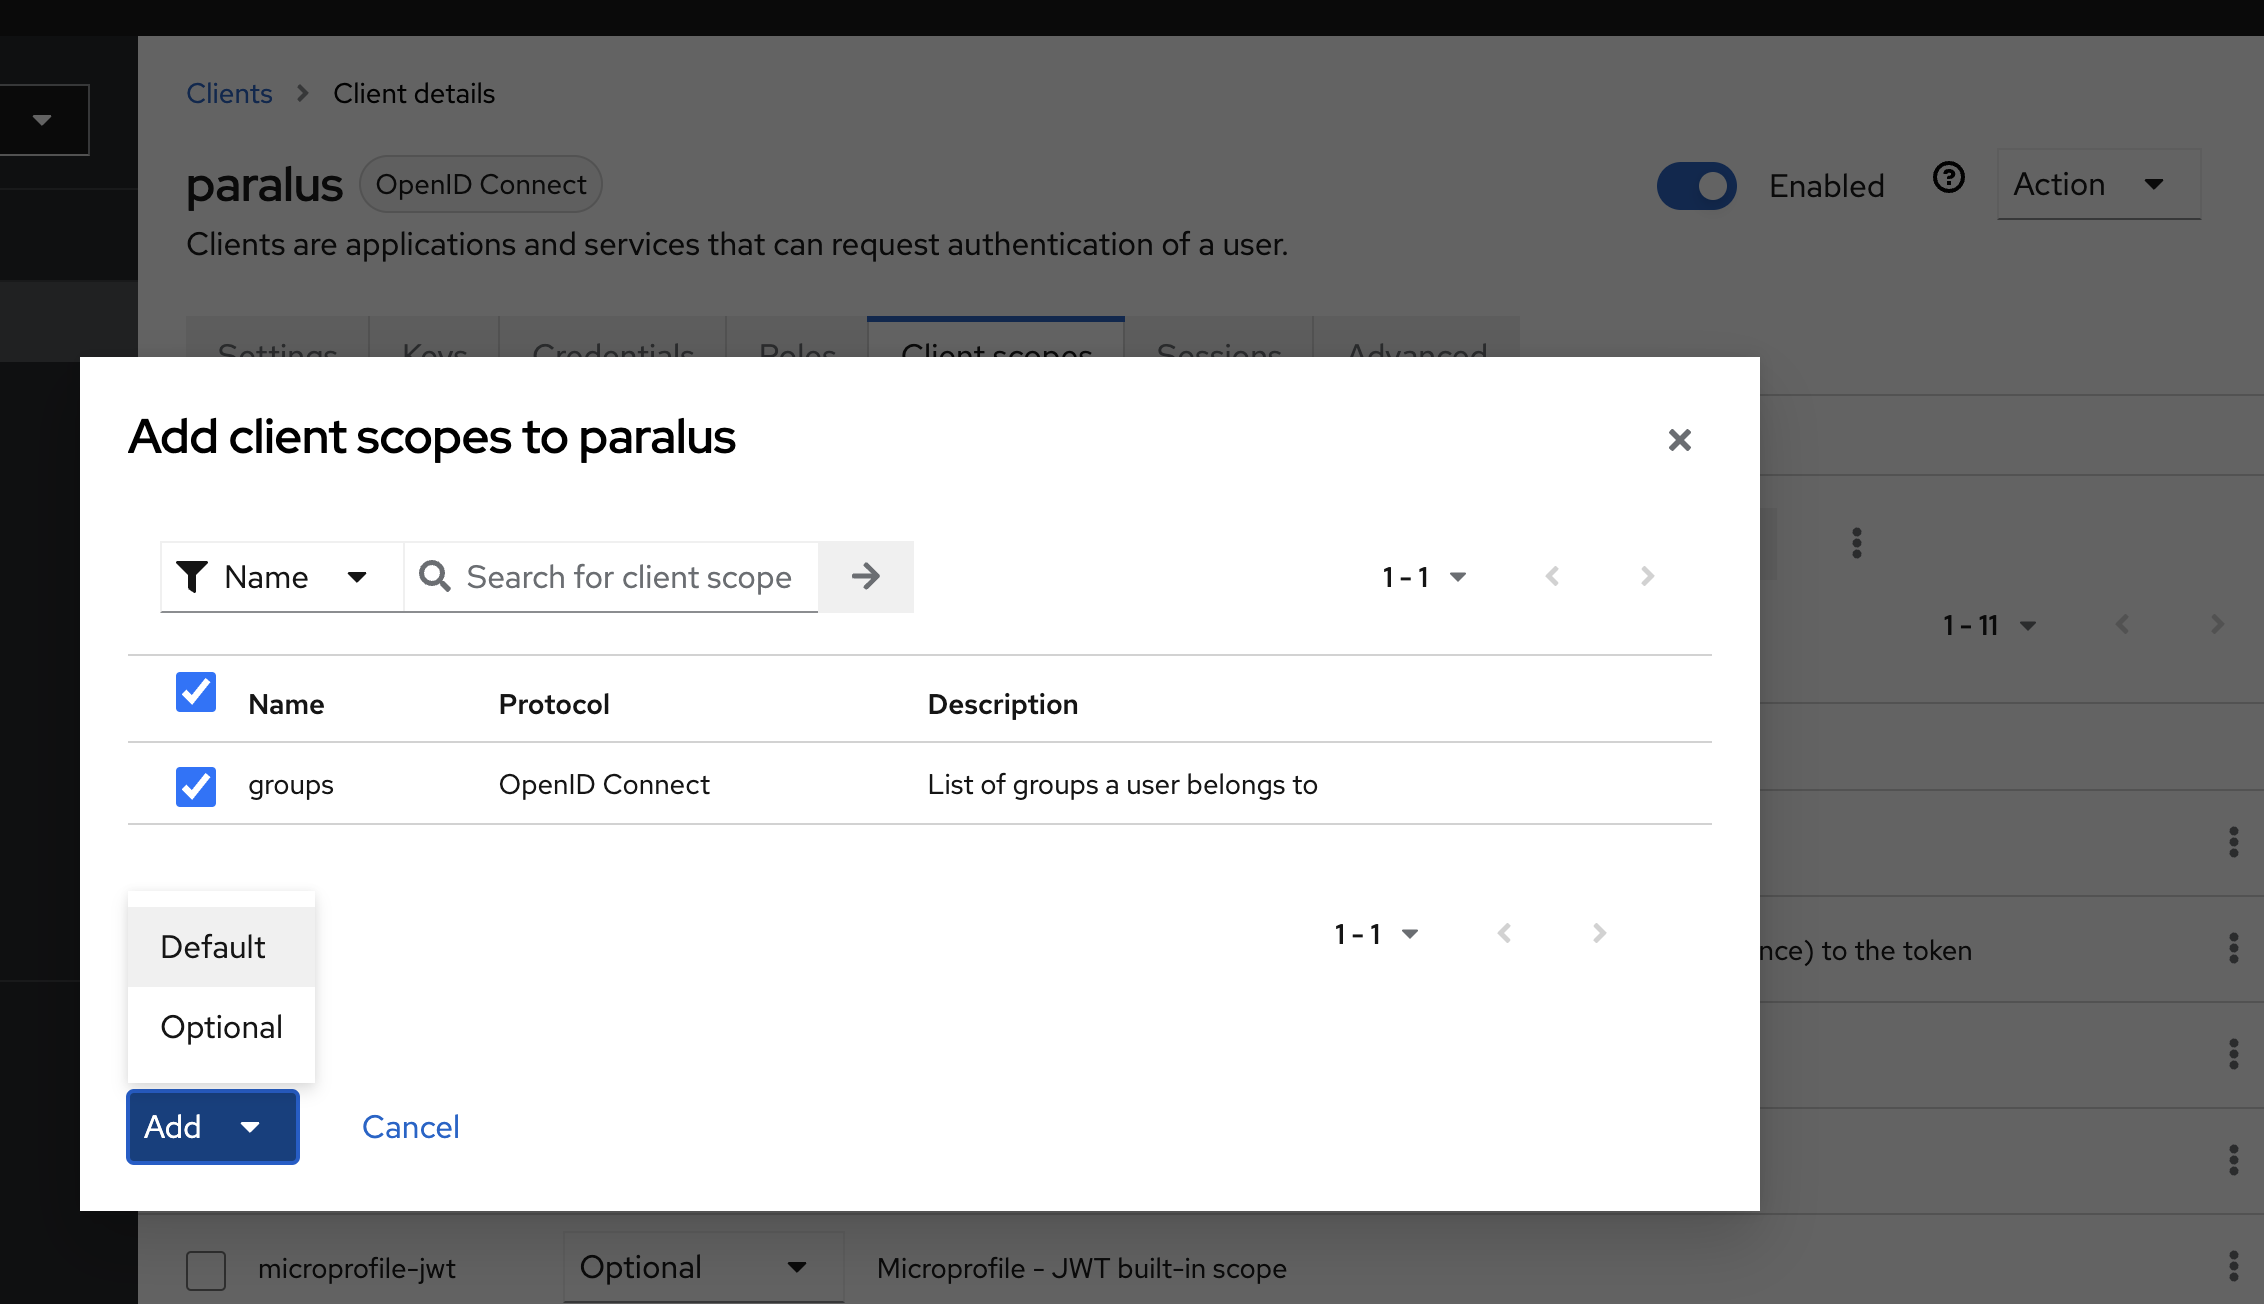
The final step is to add the client scope to the client you created earlier. If you select default when adding, the scope is automatic returned, otherwise you will need to add the scope when configuring paralus.
Adding an Identity Provider to Paralus
Login to your Paralus dashboard and navigate to System -> Identity Providers and click on New Identity Provider
Provide the name for the identity provider and choose IdP type Generic from the drop down.
For client identifier & secret, provide the client-id & client-secret of the Keycloak app created earlier.
Under Scopes provide email, profile, openid. If you want the groups as well, and you have not made it a default, you will need to add the groups scope.
For Issuer URL, provide the url for your realm (depending on the version of keycloak you mihgt need to add auth at the front of the path): https://keycloak.example.com/realms/REALM, for the Auth Url you will need to add /protocol/openid-connect/auth to the end of the URL and for Token Url /protocol/openid-connect/token.
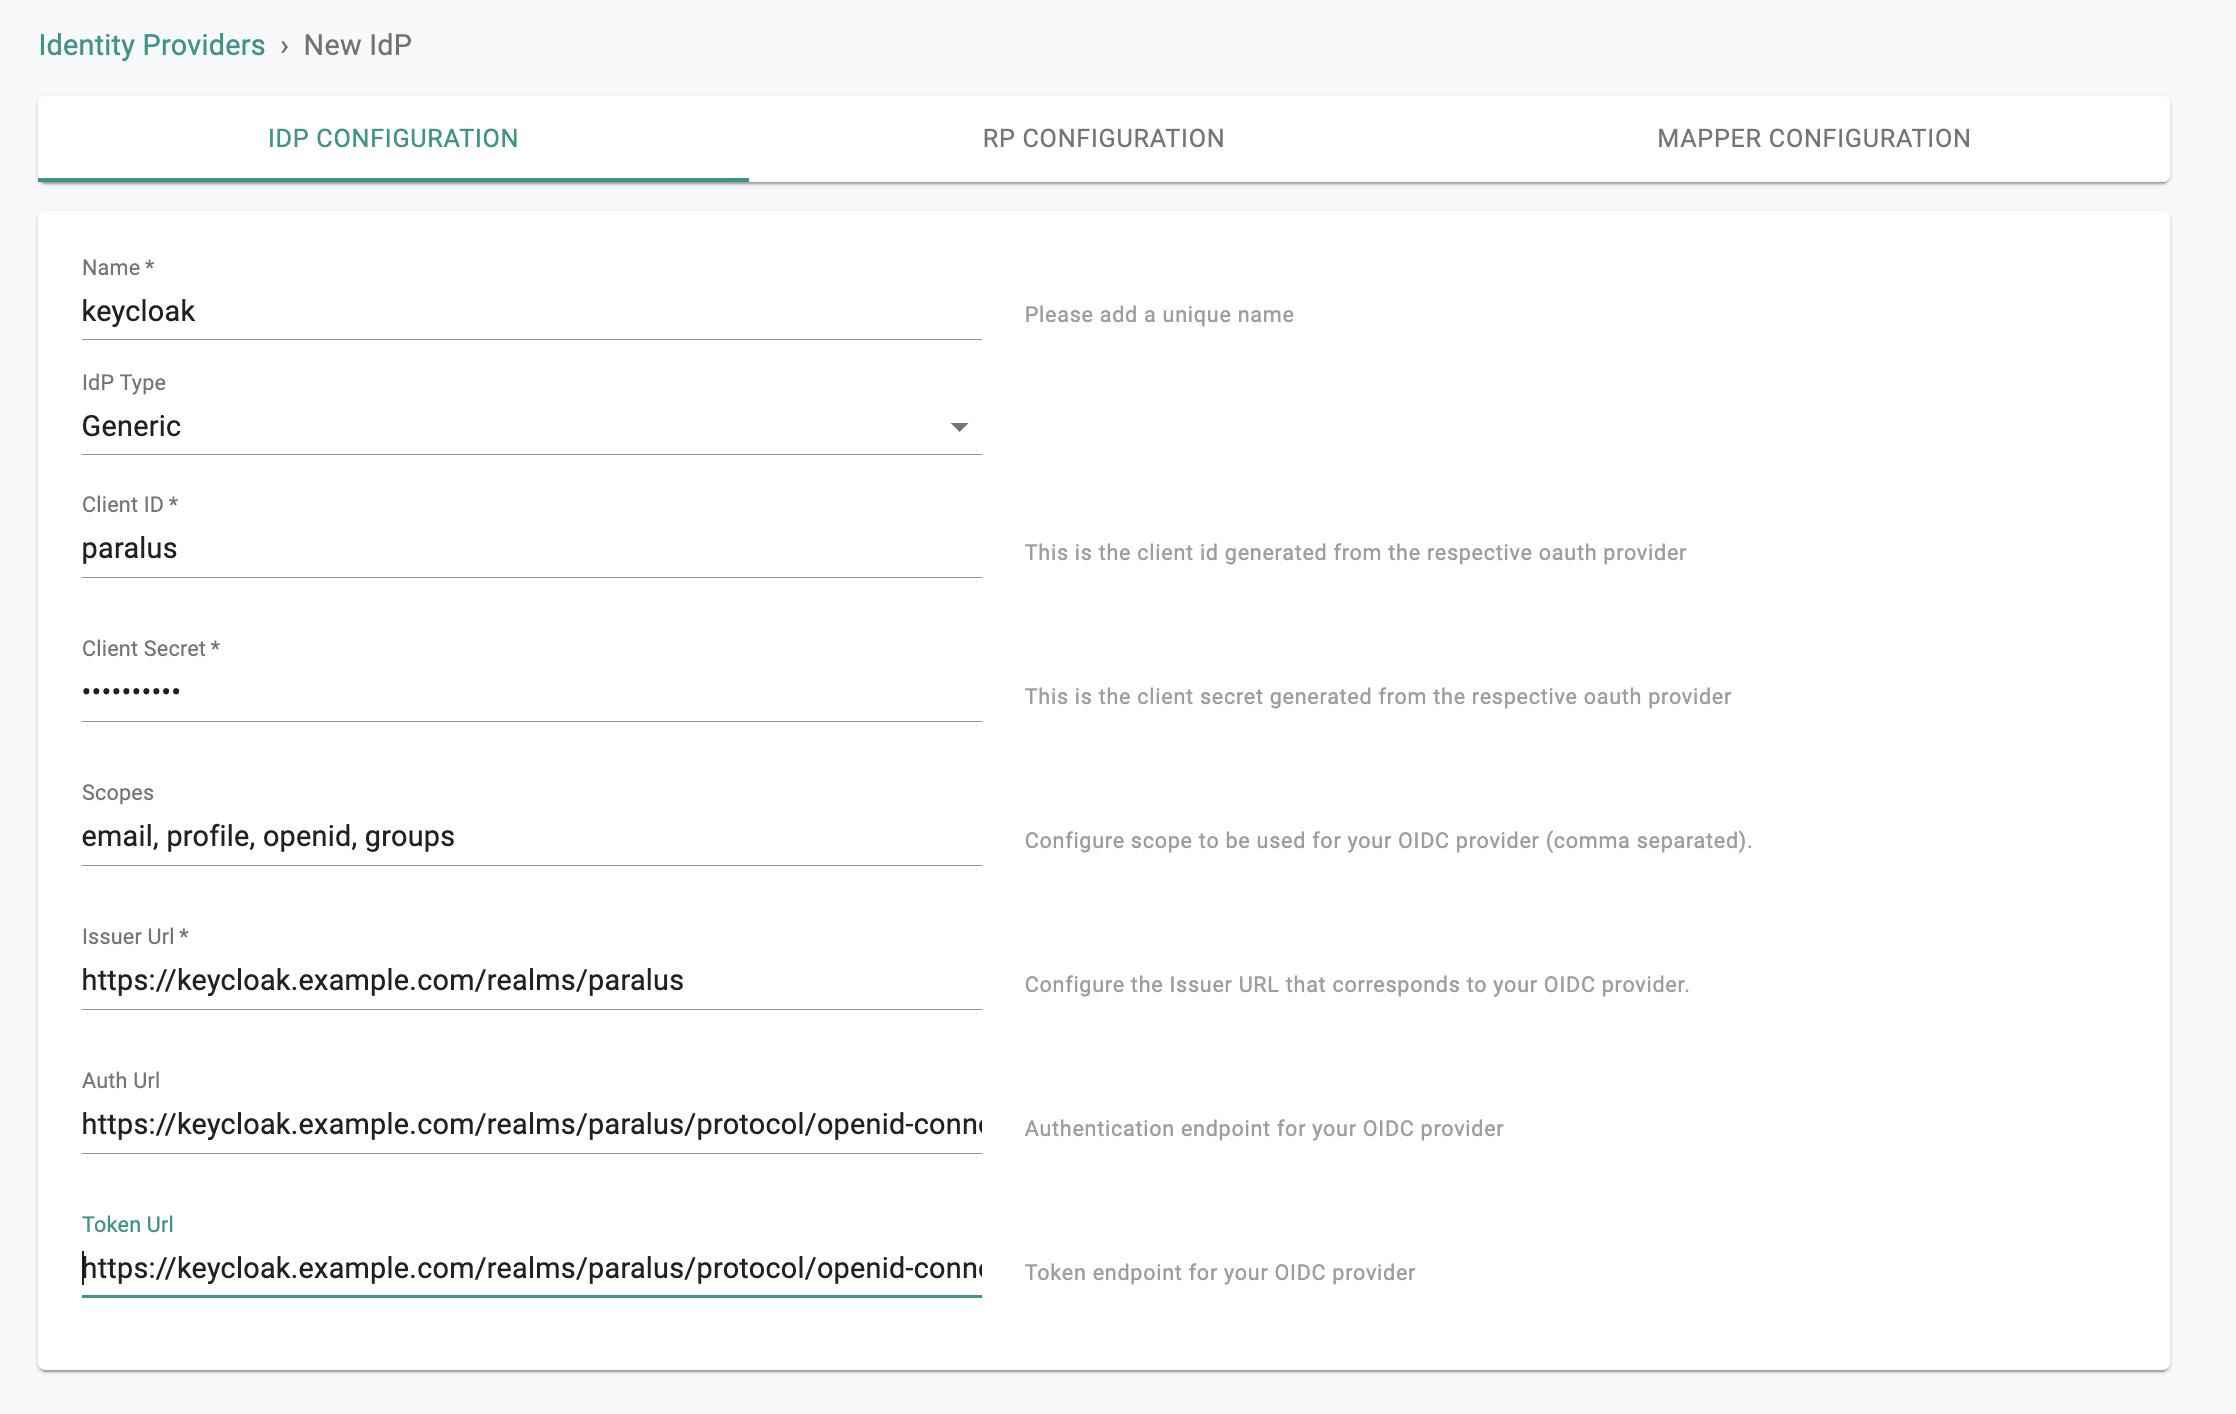
Click Save & Continue.
From the next screen copy the Callback URL and paste it in the callback URL for the Keycloak OAuth app created in the earlier step.
On the Mapper Configuration screen set the mapper url to https://raw.githubusercontent.com/paralus/paralus/main/_kratos/oidc-mappers/keycloak.jsonnet, click Save & Exit.
At this point, you have successfully added Keycloak as an identity provider for Paralus.
Verify Login with Keycloak
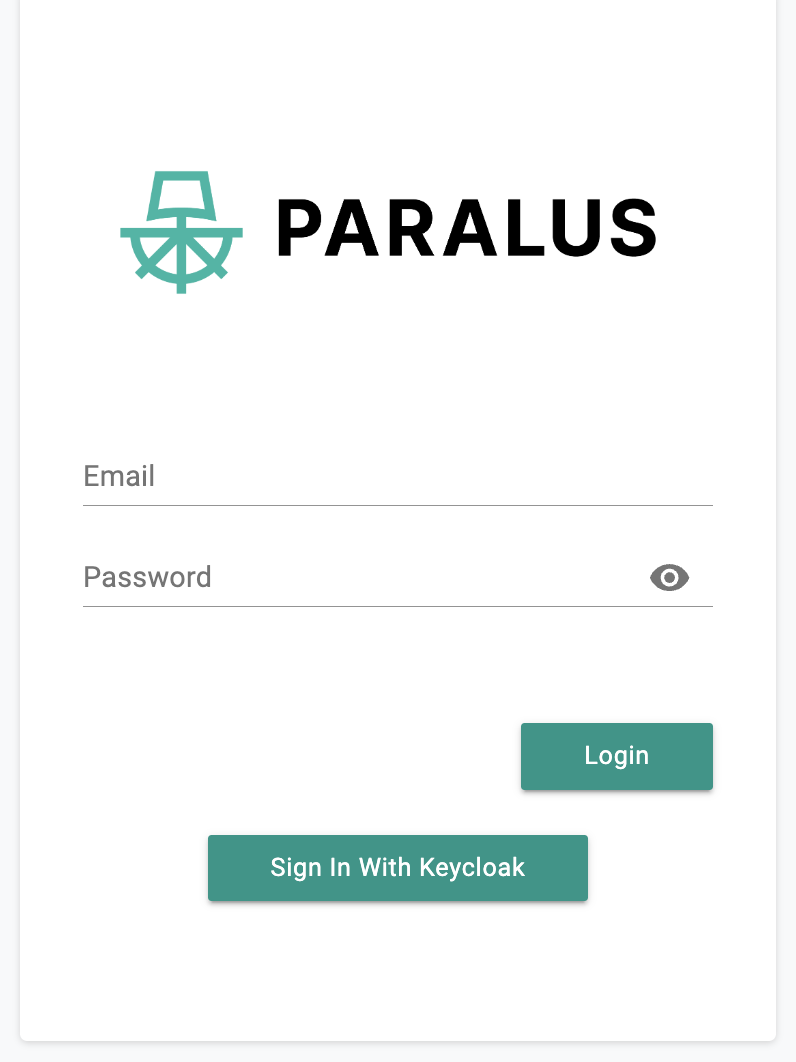
To confirm if the setup was correct, logout from Paralus.
On the login screen, you should now see a Sign In With Keycloak button. Click on it to begin the login process using Keycloak.
Enter your Keycloak credentials and login to Keycloak.
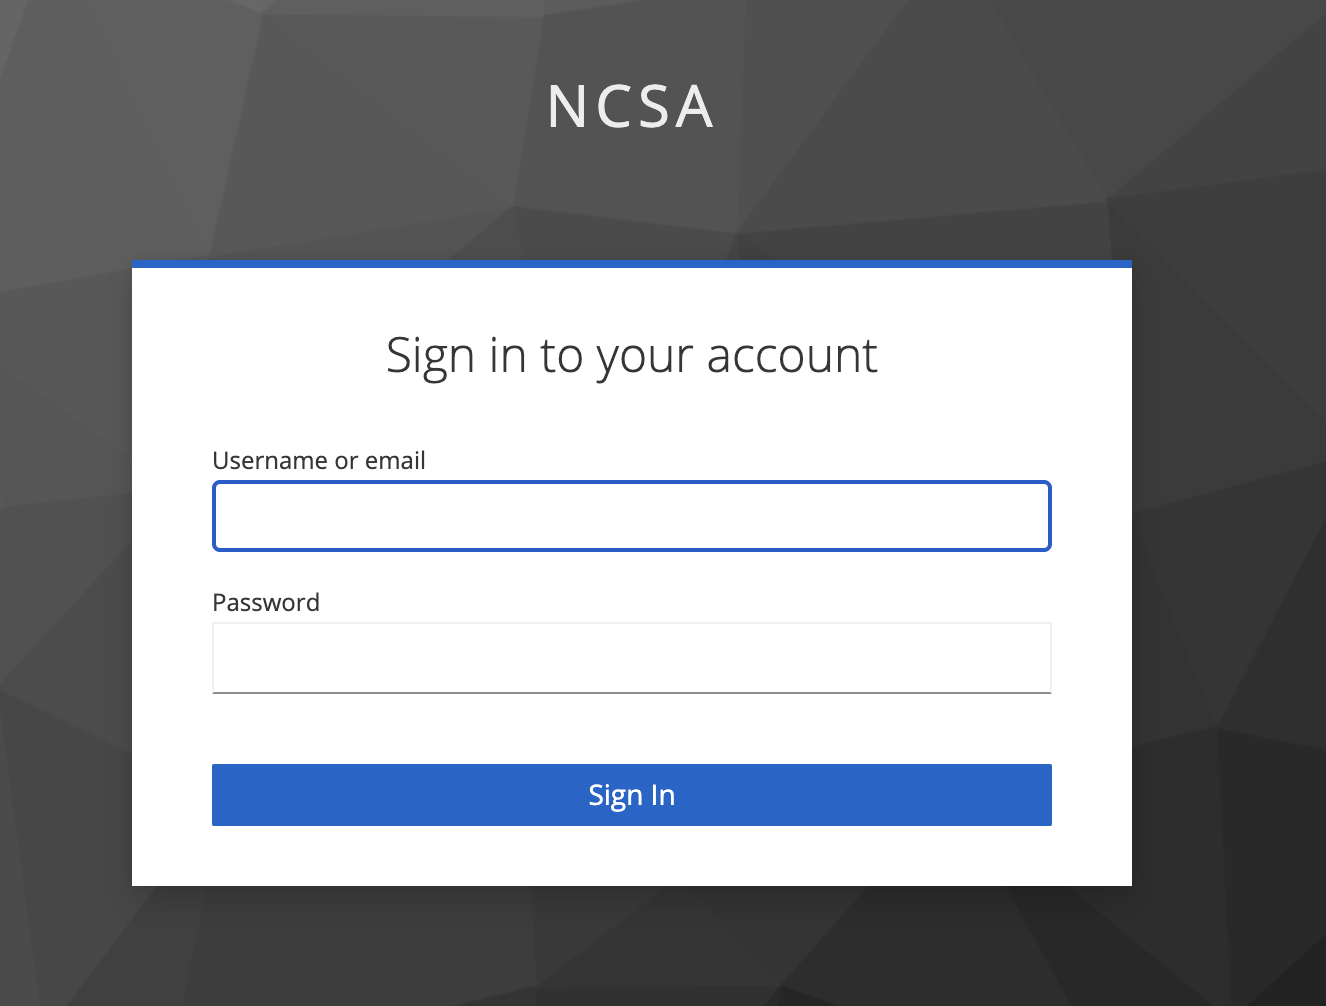
Once authenticated, you'll be redirected to Paralus dashboard.
Congratulations! You've successfully configured Keycloak as an identity provider for Paralus.
Note: Depending on the permission, the user that logs in using Keycloak might not see any projects on the dashboard and can not login and will be redirected back to the login screen. As an admin, you'll have to configure their group and assign them a project.
