
In the previous blog posts we showed how you can set up Paralus on various cloud based Kubernetes clusters like Azure, AWS and GCP. We also shared a tutorial on setting up Paralus on a Kind cluster.
All these posts have helped people get started with Paralus. However, there have been requests for details on how to set up Paralus on MicroK8s cluster. In this blog post, we do exactly that.
In this tutorial we'll show you how to setup Paralus on a local Microk8s clusters along with all the configurations that are required.
Table Of Content:
MicroK8s
MicroK8s is a light weight Kubernetes offering for developers, software vendors and DevOps folks. It can run on any system including laptops, servers and IoT devices like Raspberry Pi. It is one of the smallest, fastest & easily configurable Kubernetes offering out there. Refer to MicroK8s documentation to know more about it.
Installing and Configuring MicroK8s
If you don't already have MicroK8s installed on your local system, you can do so by following the MicroK8s Installation Guide.
To check the status of your MicroK8s installation, run the following command:
microk8s status --wait-ready

microk8s is running
high-availability: no
  datastore master nodes: 127.0.0.1:19001
  datastore standby nodes: none
addons:
  enabled:
    ha-cluster           # (core) Configure high availability on the current node
  disabled:
    community            # (core) The community addons repository
    dashboard            # (core) The Kubernetes dashboard
    dns                  # (core) CoreDNS
    gpu                  # (core) Automatic enablement of Nvidia CUDA
    helm                 # (core) Helm 2 - the package manager for Kubernetes
    helm3                # (core) Helm 3 - Kubernetes package manager
    host-access          # (core) Allow Pods connecting to Host services smoothly
    hostpath-storage     # (core) Storage class; allocates storage from host directory
    ingress              # (core) Ingress controller for external access
    mayastor             # (core) OpenEBS MayaStor
    metallb              # (core) Loadbalancer for your Kubernetes cluster
    metrics-server       # (core) K8s Metrics Server for API access to service metrics
    prometheus           # (core) Prometheus operator for monitoring and logging
    rbac                 # (core) Role-Based Access Control for authorisation
    registry             # (core) Private image registry exposed on localhost:32000
    storage              # (core) Alias to hostpath-storage add-on, deprecated
As mentioned, this is a light weight offering and hence a lot of addons are disabled by default. We need to enable a few of them to be able to run Paralus. In this case we need to enable dns, hostpath-storage and metallb, you can do so by running the enable command:
sudo microk8s enable dns hostpath-storage

Infer repository core for addon dns
Infer repository core for addon hostpath-storage
Enabling DNS
Applying manifest
serviceaccount/coredns created
configmap/coredns created
deployment.apps/coredns created
service/kube-dns created
clusterrole.rbac.authorization.k8s.io/coredns created
clusterrolebinding.rbac.authorization.k8s.io/coredns created
Restarting kubelet
DNS is enabled
Enabling default storage class.
WARNING: Hostpath storage is not suitable for production environments.

deployment.apps/hostpath-provisioner created
storageclass.storage.k8s.io/microk8s-hostpath created
serviceaccount/microk8s-hostpath created
clusterrole.rbac.authorization.k8s.io/microk8s-hostpath created
clusterrolebinding.rbac.authorization.k8s.io/microk8s-hostpath created
Storage will be available soon.
While configuring metabllb load balancer, it will ask you to provide a range of IP addresses that can be used to serve Paralus. So based on the IP address range provided by your DHCP server, you can provide the IP addresses accordingly.
sudo microk8s enable metallb

Infer repository core for addon metallb
Enabling MetalLB
Enter each IP address range delimited by comma (e.g. '10.64.140.43-10.64.140.49,192.168.0.105-192.168.0.111'): 192.168.0.200-192.168.0.210
Applying Metallb manifest
namespace/metallb-system created
secret/memberlist created
Warning: policy/v1beta1 PodSecurityPolicy is deprecated in v1.21+, unavailable in v1.25+
podsecuritypolicy.policy/controller created
podsecuritypolicy.policy/speaker created
serviceaccount/controller created
serviceaccount/speaker created
clusterrole.rbac.authorization.k8s.io/metallb-system:controller created
clusterrole.rbac.authorization.k8s.io/metallb-system:speaker created
role.rbac.authorization.k8s.io/config-watcher created
role.rbac.authorization.k8s.io/pod-lister created
clusterrolebinding.rbac.authorization.k8s.io/metallb-system:controller created
clusterrolebinding.rbac.authorization.k8s.io/metallb-system:speaker created
rolebinding.rbac.authorization.k8s.io/config-watcher created
rolebinding.rbac.authorization.k8s.io/pod-lister created
Warning: spec.template.spec.nodeSelector[beta.kubernetes.io/os]: deprecated since v1.14; use "kubernetes.io/os" instead
daemonset.apps/speaker created
deployment.apps/controller created
configmap/config created
MetalLB is enabled
Note: The above IP address range that is provided is for sandbox/local environment only. For a production setup, you will need valid IP addresses for metallb to work correctly.
At this point, you have successfully configured MicroK8s and can proceed to install Paralus
Installing Paralus
Add the paralus helm repository
helm repo add paralus https://paralus.github.io/helm-charts
helm repo update
   helm install myrelease paralus/ztka \
    -f https://raw.githubusercontent.com/paralus/helm-charts/main/examples/values.dev-generic.yaml \
    --set fqdn.domain="paralus.local" \
    -n paralus \
    --create-namespace
Note: In case you get an
Error: INSTALLATION FAILED: Kubernetes cluster unreachableerror, you need to set yourkubeconfigcontext right. You can do so be runningsudo microk8s.kubectl config view --raw > ~/.kube/config.
Note: Since v0.1.9, elasticsearch is an optional component. By default, Paralus will use database (Postgres) as the auditlog storage component. If you're doing a fresh install, below are the values.yaml file that you must pass during installation:
- Postgres (default): https://raw.githubusercontent.com/paralus/helm-charts/main/examples/values.dev-generic.yaml
- Elasticsearch: https://raw.githubusercontent.com/paralus/helm-charts/main/examples/values.elasticsearch.yaml
You'll see the following output if the installation succeeds:
NAME: myrelease
LAST DEPLOYED: Thu Jul 28 09:01:27 2022
NAMESPACE: paralus
STATUS: deployed
REVISION: 1
NOTES:
1. Access the application URL by running these commands:
  Open http://console.paralus.local in browser.

You can view the default password for admin@paralus.local by running the following command once all the pods are running:

kubectl logs -f --namespace paralus $(kubectl get pods --namespace paralus -l app.kubernetes.io/name='paralus' -o jsonpath='{ .items[0].metadata.name }') initialize | grep 'Org Admin default password:'
Note: It can take upto a few minutes before all the pods are running and you can access the dashboard. You can check the status using
watch kubectl get pods
Configuring /etc/hosts
Since we are deploying Paralus on local cluster, we need to update the /etc/hosts file with the IP Address/Ingress Host name to access the dashboard.
In order to do that, we need the IP address of the loadbalancer service that we will use to access Paralus. You can run the following command to get the required details:
kubectl get service myrelease-contour-envoy -n paralus

NAME                      TYPE           CLUSTER-IP      EXTERNAL-IP     PORT(S)                      AGE
myrelease-contour-envoy   LoadBalancer   10.152.183.106   192.168.0.200   80:31644/TCP,443:31126/TCP   2m38s
Edit the /etc/hosts file using your favourite editor and add the following line at the end of it along with the EXTERNAL-IP address obtained and save it.
192.168.0.200 console.paralus.local
Open your favorite web browser and navigate to http://console.paralus.local, you will be see the dashboard with the login screen
Note: Docker-for-Mac does not expose container networks directly on the macOS host & hence you will not be able to access Paralus dashboard if you're on a Mac machine. We suggest using docker-mac-net-connect utility to overcome this issue.
Resetting Default Password
Paralus comes configured with default credentials that allow you to access the dashboard.
In order to get the default password, copy the command displayed after helm install and execute it
kubectl logs -f --namespace paralus $(kubectl get pods --namespace paralus -l app.kubernetes.io/name='paralus' -o jsonpath='{ .items[0].metadata.name }') initialize | grep 'Org Admin default password:'

Org Admin default password: 8[&C2(74^
In a new browser window/tab navigate to http://console.paralus.local and log in with the following credentials:
- username:
admin@paralus.local- or the one you specified invalues.yaml - password:
<generated above>
It will ask you to change the default password. Please provide new set of passwords to proceed. If successful, you'll be redirected to the projects page where you'll see a default project.
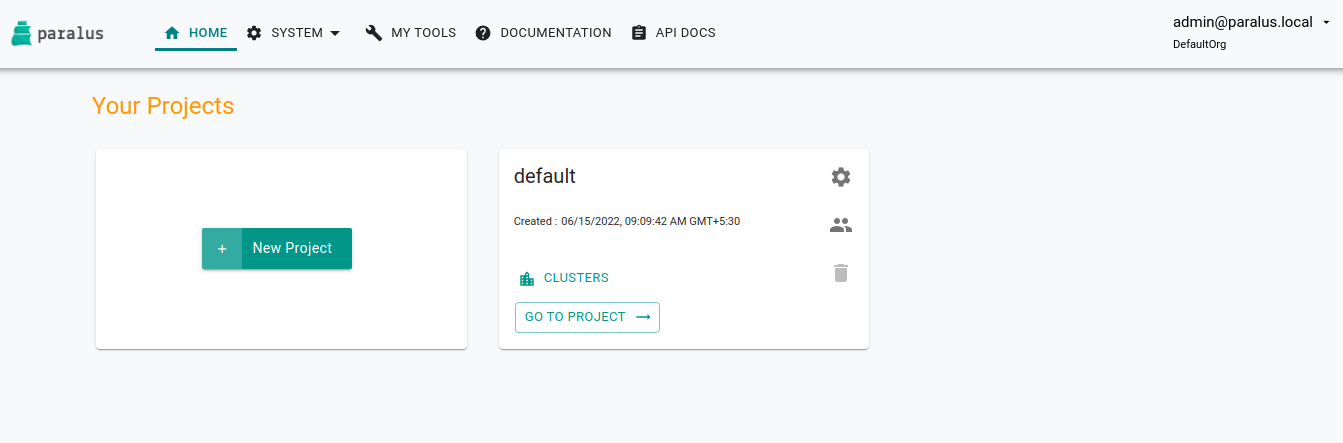
Importing Existing Cluster
Everything in Paralus is grouped into Projects. Each project will have clusters, users and groups associated with it. Hence the first step it to create a new project.
Click on New Project to create a new project and then import a cluster in that project.

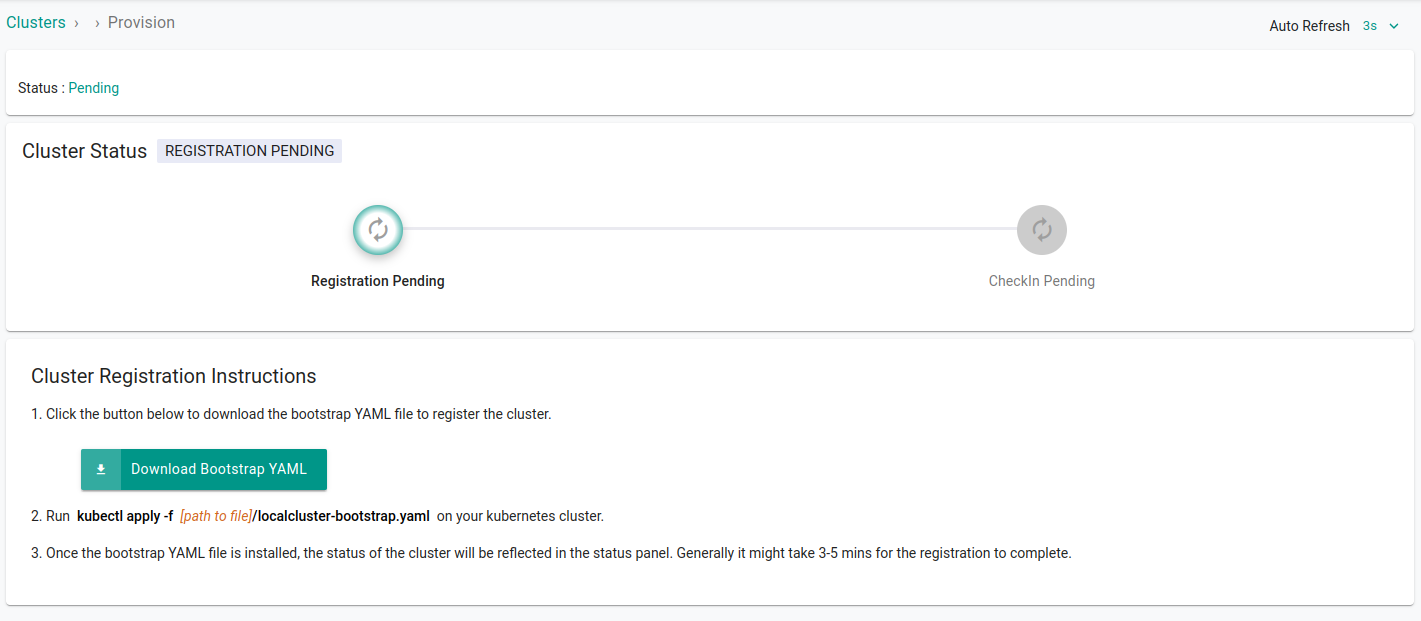
Click Continue and download the bootstrap yaml file by clicking Import Bootstrap YAML. This will download the YAML file that is required to connect your cluster with Paralus.
Configuring Network
Getting Cluster ID and Hostname
Open the downloaded yaml file in a text editor and look for clusterID
data:
  clusterID: 5dceca49-c6cd-4a2b-b65a-f193c4fa001f
  relays: '[{"token":"cakmpdvjd030q1q53p9g","addr":"console.paralus.local:80","endpoint":"*.core-connector.paralus.local:443","name":"paralus-core-relay-agent","templateToken":"cakl93fjd030q1q53p5g"}]'
Note down the clusterID
Configuring HostAliases
Note: This step is required only when you're importing microk8s cluster. You can skip to updating etc/hosts if you're importing any different cluster.
As this setup is being done on a local system, a public IP address or a domain is missing. Hence, there's a need to configure spec.hostAliases for the relay agent pod in the downloaded yaml file present in the cluster being imported.
To make the configuration changes, you need the CLUSTER-IP address of Loadbalancer
Use the command kubectl get svc -A and note down the IP address of <releasename>-contour-envoy
$ microk8s kubectl get svc -A
NAMESPACE        NAME                       TYPE           CLUSTER-IP       EXTERNAL-IP      PORT(S)                         AGE
default          kubernetes                 ClusterIP      10.152.183.1     <none>           443/TCP                         3d19h
kube-system      kube-dns                   ClusterIP      10.152.183.10    <none>           53/UDP,53/TCP,9153/TCP          3d19h
metallb-system   webhook-service            ClusterIP      10.152.183.206   <none>           443/TCP                         3d18h
paralus          myrelease-kratos-courier   ClusterIP      None             <none>           80/TCP                          3d18h
paralus          myrelease-postgresql-hl    ClusterIP      None             <none>           5432/TCP                        3d18h
paralus          paralus                    ClusterIP      10.152.183.221   <none>           11000/TCP,10000/TCP,10001/TCP   3d18h
paralus          myrelease-kratos-admin     ClusterIP      10.152.183.187   <none>           80/TCP                          3d18h
paralus          dashboard                  ClusterIP      10.152.183.149   <none>           80/TCP                          3d18h
paralus          prompt                     ClusterIP      10.152.183.65    <none>           7009/TCP                        3d18h
paralus          myrelease-fluent-bit       ClusterIP      10.152.183.121   <none>           2020/TCP                        3d18h
paralus          relay-server               ClusterIP      10.152.183.80    <none>           443/TCP                         3d18h
paralus          myrelease-contour-envoy    LoadBalancer   10.152.183.106   192.168.14.160   80:30600/TCP,443:31855/TCP      3d18h
paralus          myrelease-postgresql       ClusterIP      10.152.183.203   <none>           5432/TCP                        3d18h
paralus          myrelease-contour          ClusterIP      10.152.183.146   <none>           8001/TCP                        3d18h
paralus          myrelease-kratos-public    ClusterIP      10.152.183.64    <none>           80/TCP                          3d18h
In this case the CLUSTER-IP is 10.152.183.106.
Open the downloaded yaml file and add the following lines under spec.hostAliases for relay-agent deployment.
...
hostAliases:
  - ip: 10.152.183.106
  hostnames:
    - "console.paralus.local"
    - "5dceca49-c6cd-4a2b-b65a-f193c4fa001f.user.paralus.local"
    - "5dceca49-c6cd-4a2b-b65a-f193c4fa001f.core-connector.paralus.local"
...
Updating /etc/hosts
Add two new lines in /etc/hosts file along with the IP address obtained and the hostnames. This ensures that the target cluster is able to resolve the hostname and reach the LoadBalancer IP address.
Only when microk8s cluster is imported, we specify the hostAliases, else the local system's /etc/hosts file is enough.
192.168.0.200 5dceca49-c6cd-4a2b-b65a-f193c4fa001f.user.paralus.local
192.168.0.200 5dceca49-c6cd-4a2b-b65a-f193c4fa001f.core-connector.paralus.local
Your final /etc/hosts file should be something like the following
192.168.0.200 console.paralus.local
192.168.0.200 5dceca49-c6cd-4a2b-b65a-f193c4fa001f.user.paralus.local
192.168.0.200 5dceca49-c6cd-4a2b-b65a-f193c4fa001f.core-connector.paralus.local
Accessing Existing Cluster
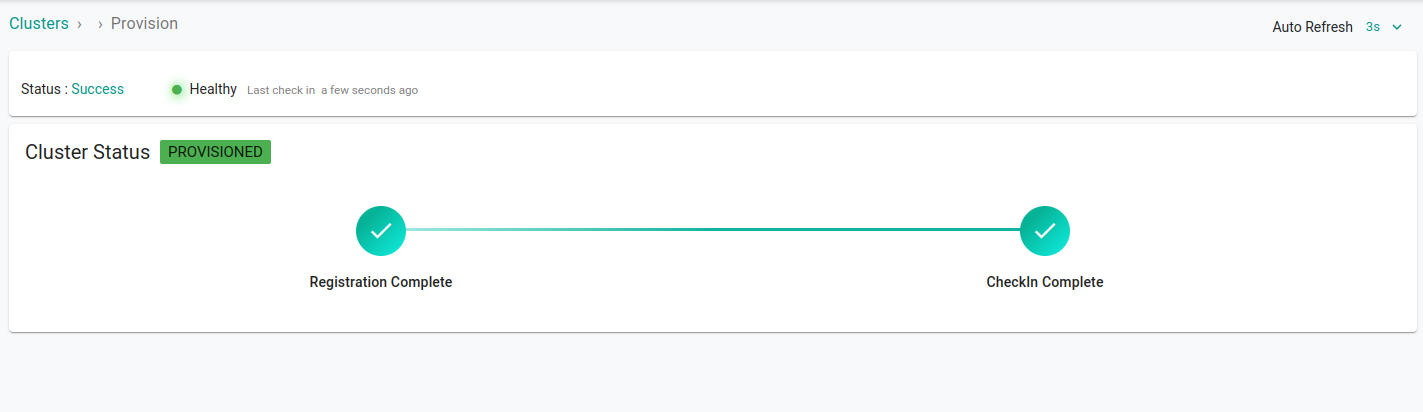
With all the changes in place, it's time to apply the bootstrap yaml file that we download while importing an existing cluster
kubectl apply -f mylocalcluster.yaml
Wait for the changes to take place. On the dashboard you will see that the cluster is imported successfully. It usually takes 3-5 minutes for the status to update.
You can also execute
kubectl get podsto check the status.
Using Web Kubectl
At this point, the cluster is successfully imported to Paralus. However, in order to use kubectl from the dashboard, we need to configure the prompt deplpoyment.
Edit prompt deployment using kubectl edit deployment prompt -n Paralus. Add the following lines under spec.hostAliases to the deployment:
...
hostAliases:
  - hostnames:
    - console.paralus.local
    - 5dceca49-c6cd-4a2b-b65a-f193c4fa001f.user.paralus.local
    - 5dceca49-c6cd-4a2b-b65a-f193c4fa001f.core-connector.paralus.local
  ip: 10.152.183.106
...
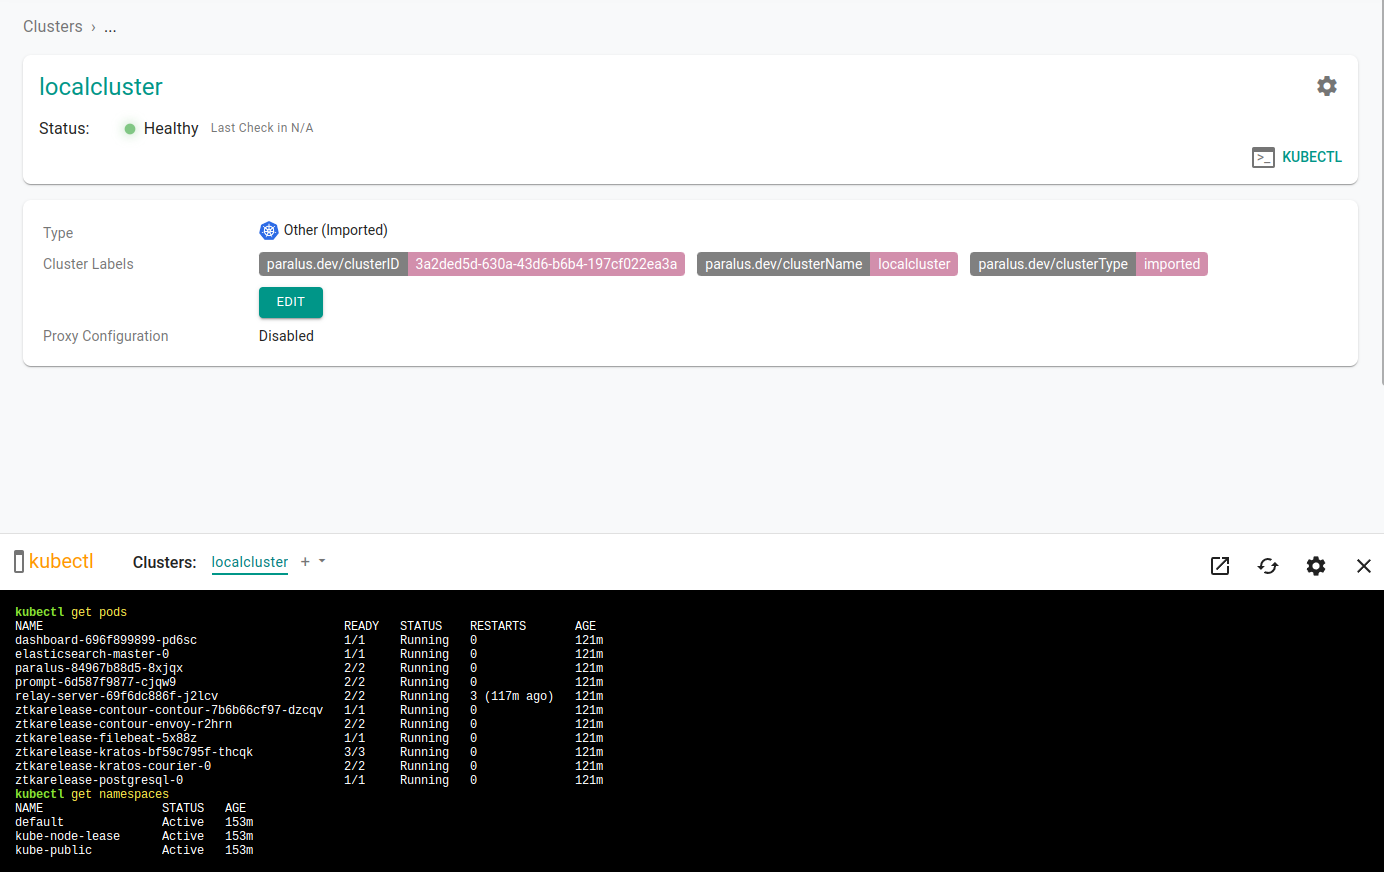
Select your newly imported cluster and click on kubectl to access the prompt and interact with your cluster from the dashboard.
A kubectl console will open in the bottom half of the screen, enter your kubectl commands to interact with your cluster.
Congratulations! You've successfully deployed Paralus and imported a local cluster on a MicroK8s cluster.
Refer to our documentation to learn about various features of Paralus.
